How do I add custom form fields?
Warning!
Please exercise caution when customizing your contact forms, as it involves editing the code directly. We are not responsible for broken code or undesirable layout shifts. Please follow the below directions carefully and test your forms thoroughly after any customizations are made to ensure they are still working properly.
By default, your full contact form includes four fields: (1) Name, (2) Email, (3) Phone, and (4) Message. The Email field is the only required field.
In addition to the default fields, you have the option to further customize your form by renaming the existing fields or adding new ones. You can include single-line text fields, radio buttons, checkboxes, and select dropdowns. Here are the items we will cover customizing in this article:
-
Rename Default Fields
-
Add Single-Line Text
-
Add Multi-Line Text
-
Add Select Dropdown
-
Add Radio Buttons
-
Add Checkboxes
Rename Default Fields
STEP 1
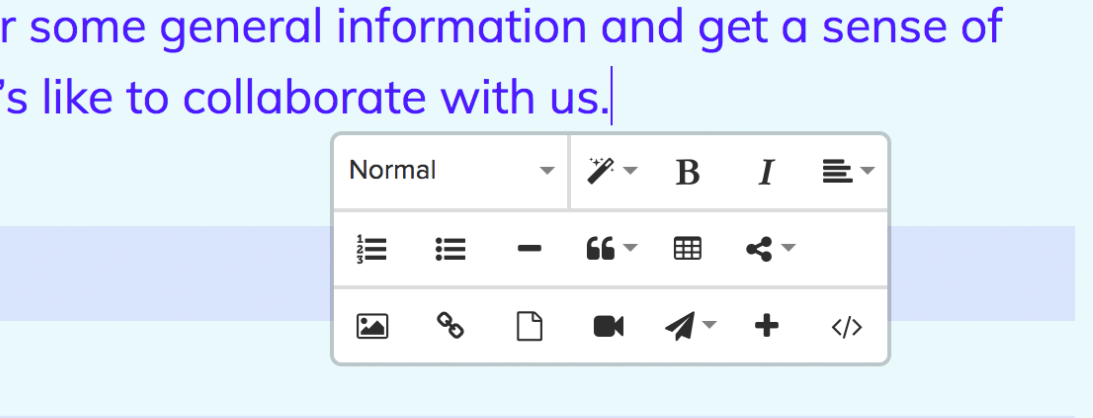
To edit the default field names, log in and navigate to the EDIT screen. Find the page(s) containing your form and click on the page content to activate the editor toolbox.
STEP 2
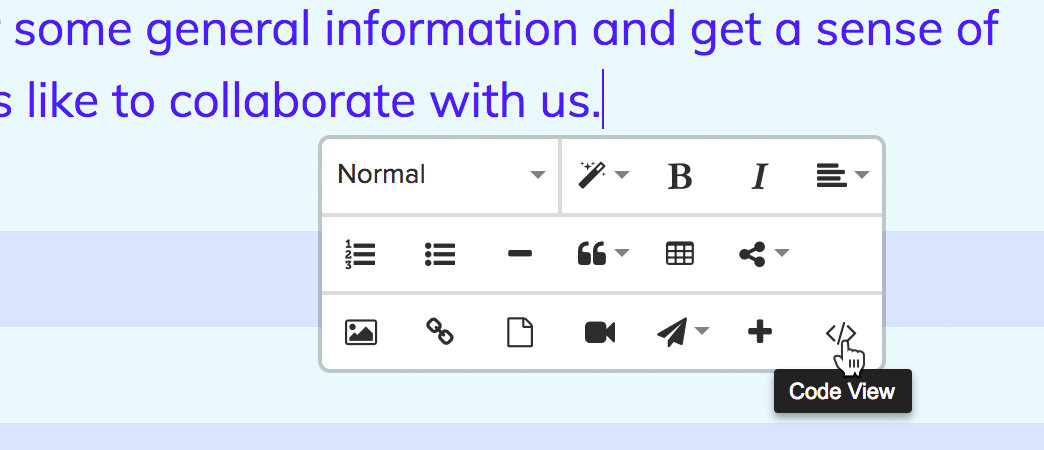
From the editing toolbox, select the </> icon.
STEP 3
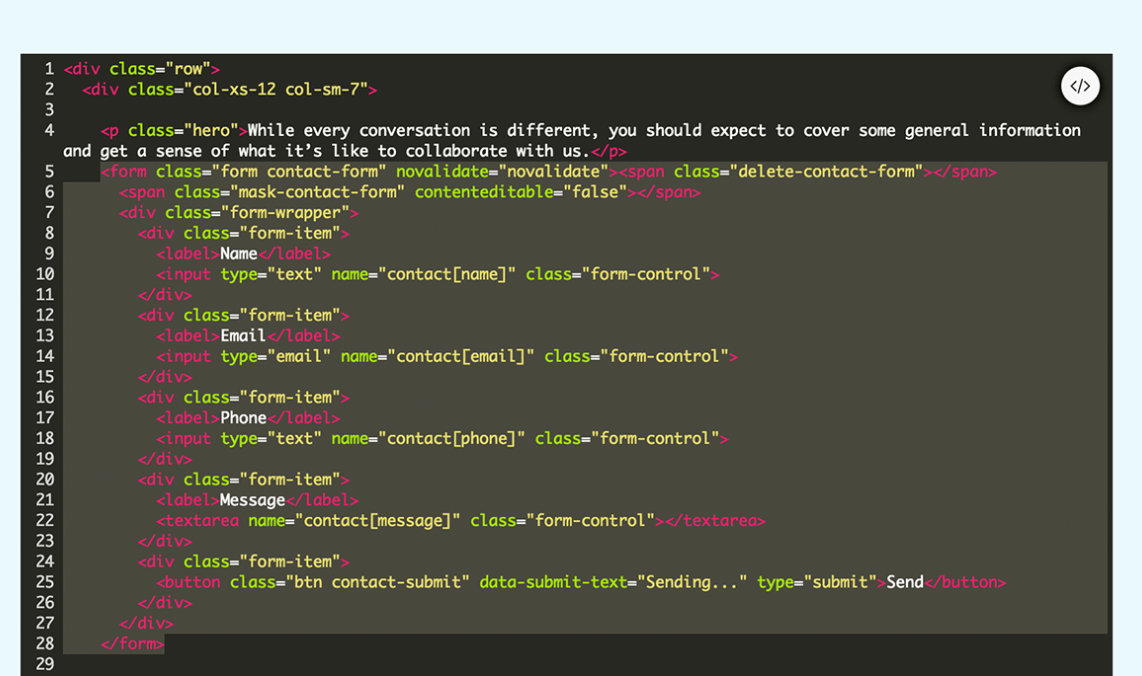
This will switch to the "Code View" of your page's content. You will see the actual website code for the page. Locate the section where your form is located; it should resemble the following:
STEP 4
For each field, you can customize the Label Text and Field Name.
-
Label Text: This text will be displayed above the field for users.
-
Field Name: This is used for processing the form and must be in lowercase without spaces.
For example, if you wish to change the "Phone" field to "Your Phone Number," find the following code:
<div class="form-item"> <label>Phone</label> <input class="form-control" name="contact[phone]" type="text" /> </div> |
To change the Label Text, look for the following:
<label>Phone</label>
Which can be changed to:
<label>Your Phone Number</label>
Next, you’ll want to change the Field Name; look for something like the following:
<input class="form-control" name="contact[phone]" type="text" />
Within the field code, you’ll see the following:
name="contact[phone]"
The name of the field is within the [] brackets. So you’d change this to:
name="contact[your-phone-number]"
Note: We recommend matching your Label Text with your Field Name, like in the above example, as the Field Name is used in the generated email notifications.
STEP 5
Once you are done, click the </> icon from the top right of the code view to switch back to the visual editor and see your updated form!
<div class="form-item"> <label>Your Phone Number</label> <input class="form-control" name="contact[your-phone-number]" type="text" /> </div> |
You’ve successfully renamed your form field! If everything looks good, don’t forget to hit Save Changes and proceed through the publishing process to make your updates live!
Add Single-Line Text

A single-line text field is useful for collecting user-entered text for short 2-5 word answers (ie. company name, age, zip code, etc)
To start, copy the code below to your clipboard:
<div class="form-item">
  <label>Your Custom Text Field</label>
  <input class="form-control" name="contact[your-custom-text-field]" type="email" />
</div>
STEP 1
To add this in, you’ll first need to be logged in and on the EDIT screen. From here, navigate to the page(s) with your form on it and click on your page content to activate the editor toolbox, and click the </> icon to activate the “Code View.”

STEP 2
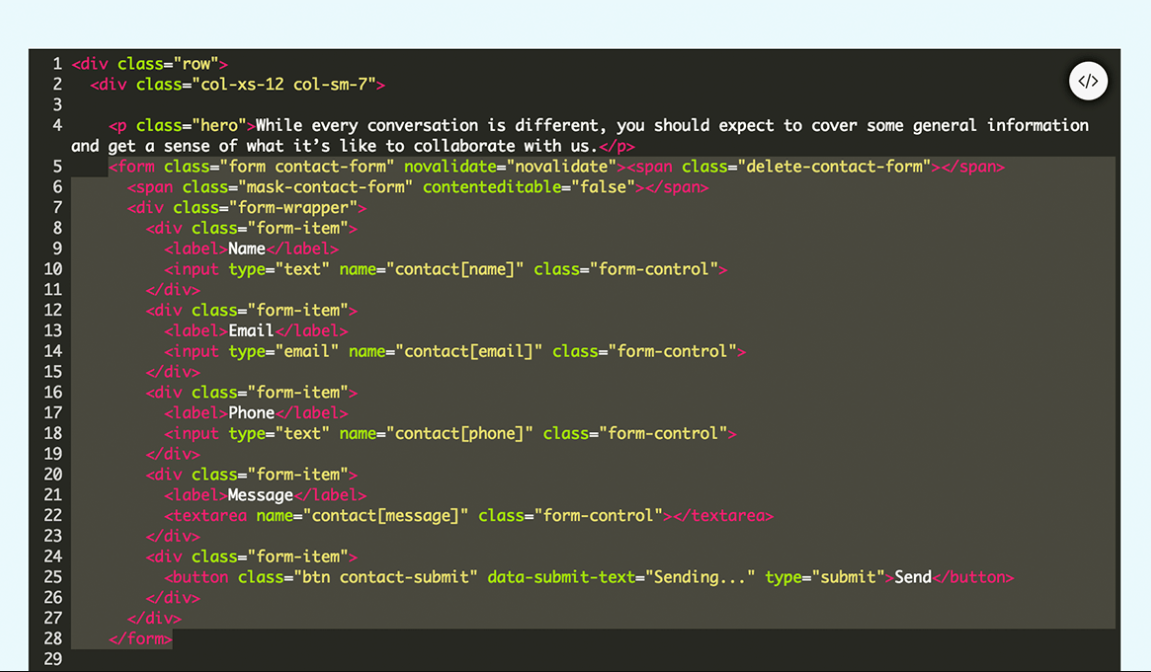
Within this code, find where your form is located; it should look something like this:
STEP 3
Each field is contained within this code: <div class="form-item"> ... </div>, so be sure you paste the code you copied above so that it falls before or after the other field’s code:
<form>
  <!-- INSERT CODE HERE -->
  <div class="form-item">...</div>
  <!-- OR HERE -->
  <div class="form-item">...</div>
  <!-- OR HERE -->
</form>
STEP 4
You will want to change the Label Text and Field Name of this field, as outlined in the first section above.
Add Multi-Line Text

Multi-Line text fields are great for long-form questions
To start, copy the code below to your clipboard:
<div class="form-item">
  <label>Your Custom Text Field</label>
  <textarea class="form-control" name="contact[your-custom-text-field]"></textarea>
</div>
STEP 1
To add this in, you’ll first need to be logged in and on the EDIT screen. From here, navigate to the page(s) with your form on it and click on your page content to activate the editor toolbox, and click the </> icon to activate the “Code View.”
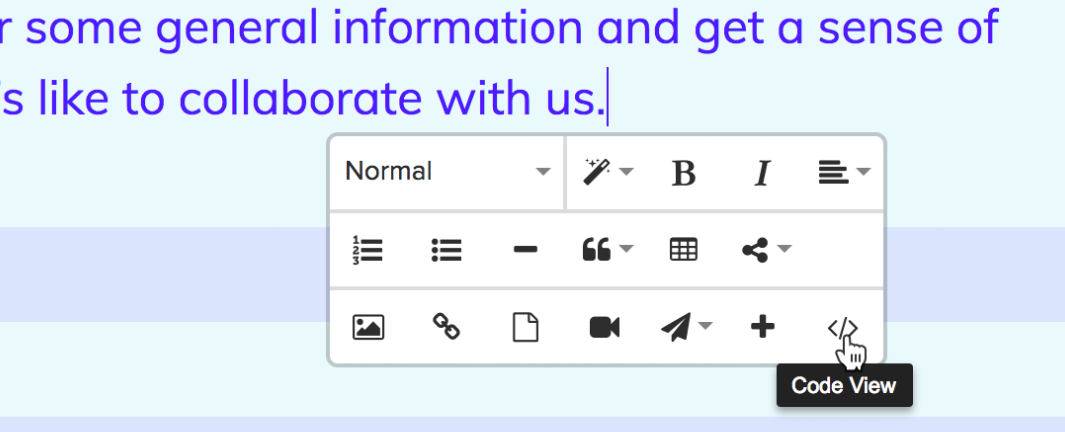
STEP 2
Within this code, find where your form is located. It should look something like this:
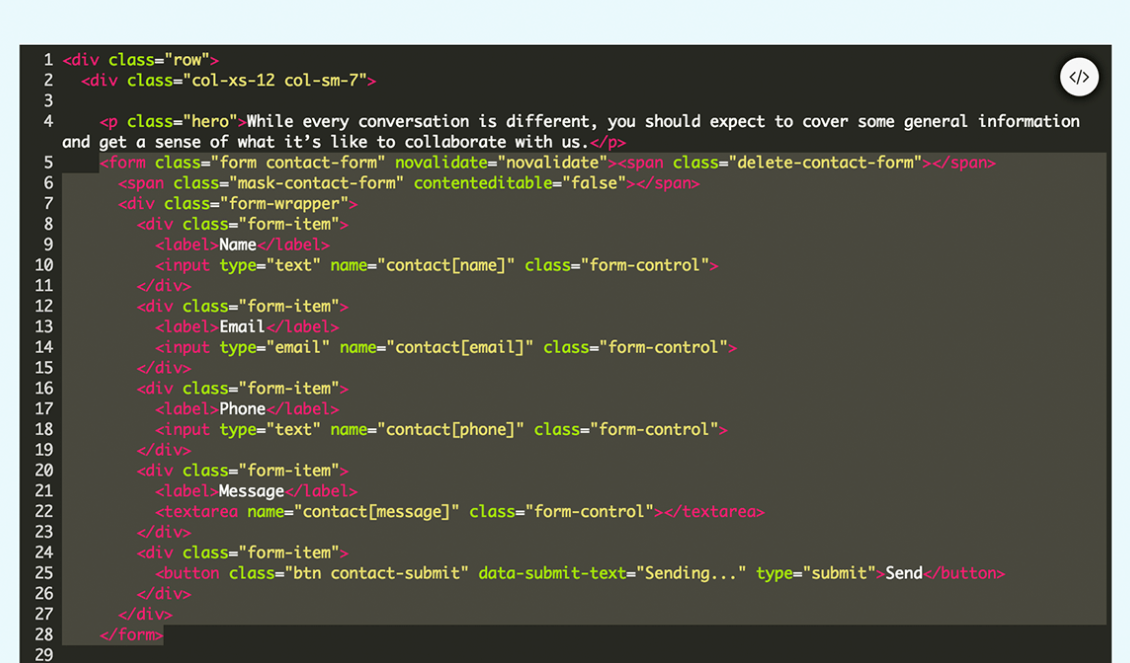
STEP 3
Each field is contained within this code: <div class="form-item"> ... </div>, so be sure you paste the code you copied above so that it falls before or after the other field’s code:
<form>
  <!-- INSERT CODE HERE -->
  <div class="form-item">...</div>
  <!-- OR HERE -->
  <div class="form-item">...</div>
  <!-- OR HERE -->
</form>
STEP 4
You will want to change the Label Text and Field Name of this field, as outlined in the first section above.
Add Select Dropdown

Select Dropdown fields are great for long, predefined options.
To start, copy the code below to your clipboard:
<div class="form-item">
  <label>Your Custom Select</label>
  <div class="select">
    <select class="form-control" name="contact[your-custom-select]">
      <option disabled="disabled" selected="selected">Choose Option</option>
      <option>Option 1</option>
      <option>Option 2</option>
      <option>Option 3</option>
      <option>Option 4</option>
    </select>
  </div>
</div>
STEP 1
To add this in, you’ll first need to be logged in and on the EDIT screen. From here, navigate to the page(s) with your form on it and click on your page content to activate the editor toolbox, and click the </> icon to activate the “Code View.”
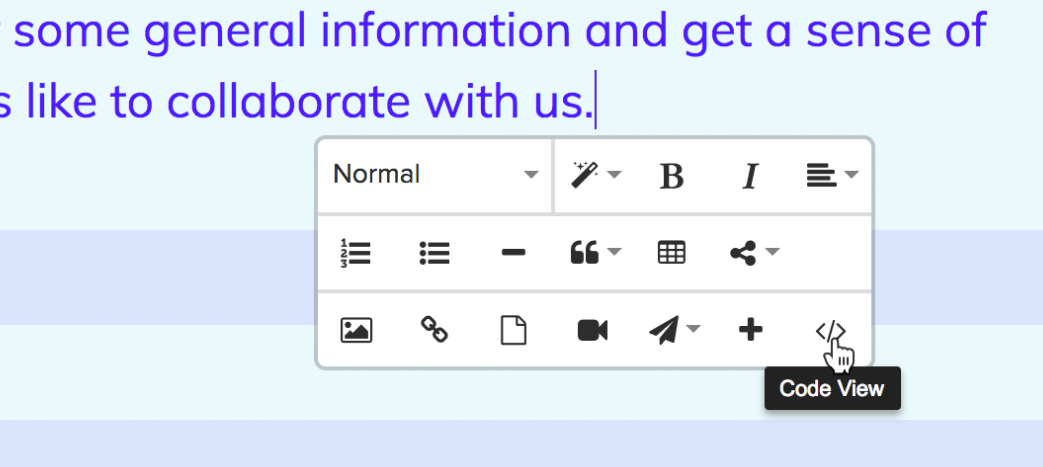
STEP 2
Within this code, find where your form is located. It should look something like this:
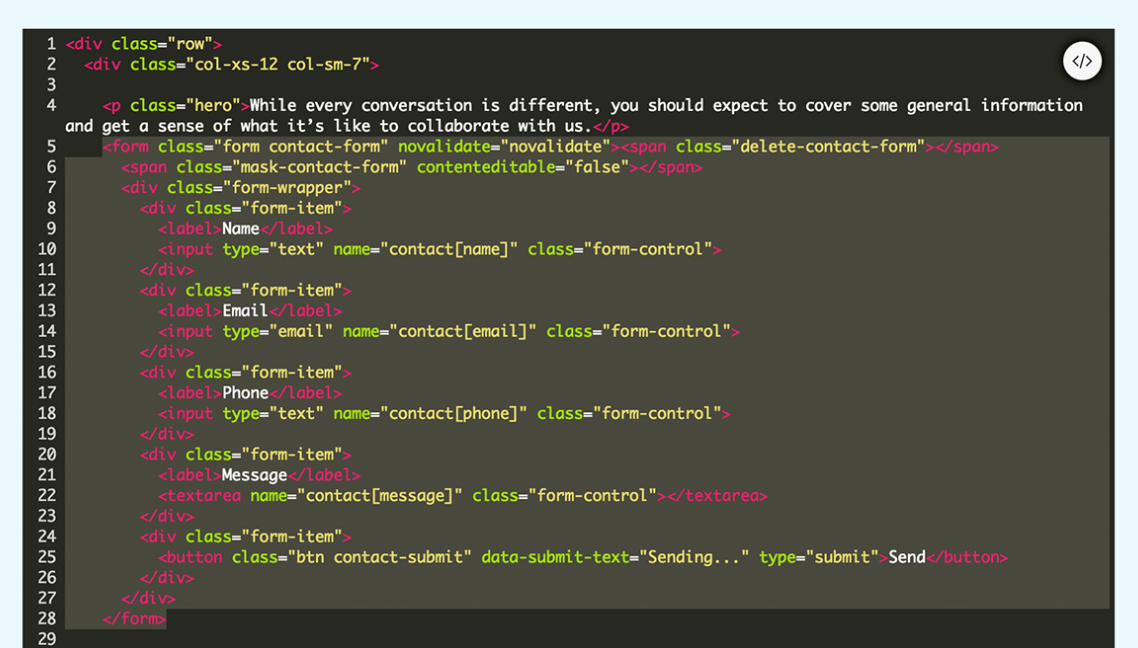
STEP 3
Each field is contained within this code: <div class="form-item"> ... </div>, so be sure you paste the code you copied above so that it falls before or after the other field’s code:
<form>
  <!-- INSERT CODE HERE -->
  <div class="form-item">...</div>
  <!-- OR HERE -->
  <div class="form-item">...</div>
  <!-- OR HERE -->
</form>
STEP 4
You will want to change the Label Text and Field Name of this field, as outlined in the first section above, but you’ll also want to customize the dropdown options available to your users. To do this, simply add/remove the following from the code you copy and pasted: <option>Option 1</option>
You’ll notice the first <option> is set up slightly differently. This is an optional default option to tell users what to do, as noted by the disabled="disabled" and selected="selected" code. Feel free to edit the text for this option as well or remove the option entirely.
Add Radio Buttons

Radio Button fields are another great way to showcase single-answer options.
To start, copy the code below to your clipboard:
<div class="form-item">
  <label>Your Custom Radio</label>
  <div class="radio-control">
    <label class="radio">
      <input name="contact[your-custom-radio]" type="radio" value="1" />Option 1
    </label>
    <label class="radio">
      <input name="contact[your-custom-radio]" type="radio" value="2" />Option 2
    </label>
  </div>
</div>
STEP 1
To add this in, you’ll first need to be logged in and on the EDIT screen. From here navigate to the page(s) with your form on it and click on your page content to activate the editor toolbox and click the </> icon to activate the “Code View”.
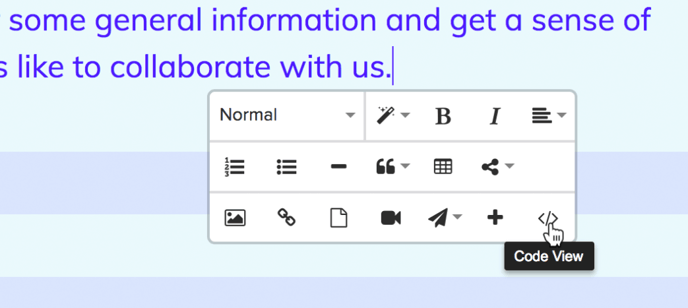
STEP 2
Within this code find where your form is located. It should look something like this:
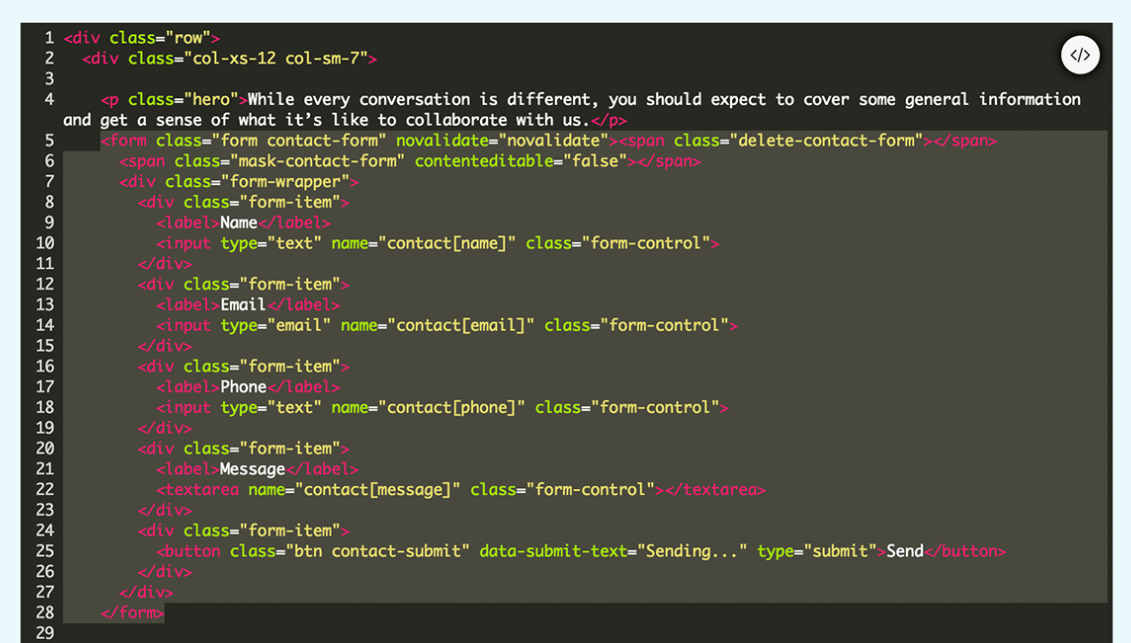
STEP 3
Each field is contained within this code: <div class="form-item"> ... </div>, so be sure you paste your code you copied above so that it falls before or after the other field’s code:
<form>
  <!-- INSERT CODE HERE -->
  <div class="form-item">...</div>
  <!-- OR HERE -->
  <div class="form-item">...</div>
  <!-- OR HERE -->
</form>
STEP 4
You will want to change the Label Text and Field Name of this field, as outlined in the first section above, but you also will need to customize your radio button options Value and Display Text. To do this, simply find the following within the code you copy and pasted:
<label class="radio">
  <input name="contact[your-custom-radio]" type="radio" value="1" />Option 1
</label>
The Value here is what you see as: value="1", simply change the 1 to whatever text you want to show up in your email notifications. The Display Text is what you see as: Option 1, which shows right before the closing </label> tag. This is the text the user will see for this option, change this to whatever you’d like.
Note: You can add/remove an unlimited number of radio button options. To create additional radio buttons in a set, simply copy and paste the above code before or after other options and customize the button Value.
Important: When changing the Field Name, please note that all radio buttons in a set must share the same field name. Do not give them a different Field Name, or else they will each be treated as a different field entirely.
Add Checkboxes
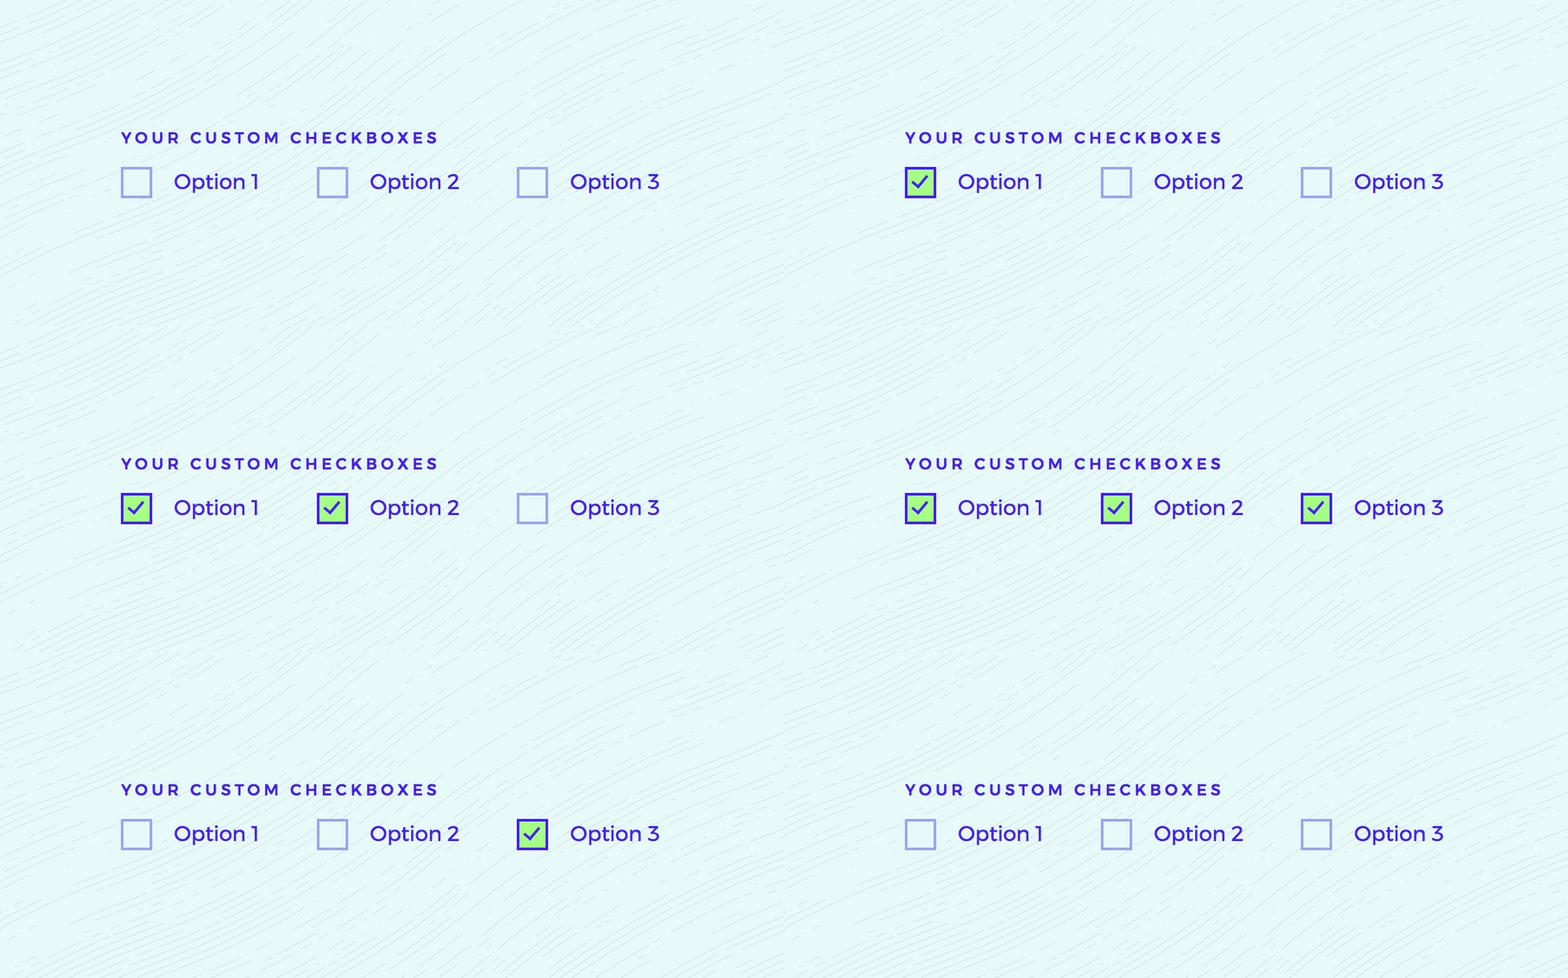
Checkboxes are great for when multi-choice questions.
To start, copy the code below to your clipboard:
<div class="form-item">
  <label>Your Custom Checkbox</label>
  <div class="checkbox-control">
    <label class="checkbox">
      <input name="contact[your-custom-checkbox][]" type="checkbox" value="1" />Option 1
    </label>
    <label class="checkbox">
      <input name="contact[your-custom-checkbox][]" type="checkbox" value="2" />Option 2
    </label>
    <label class="checkbox">
      <input name="contact[your-custom-checkbox][]" type="checkbox" value="3" />Option 3
    </label>
  </div>
</div>
STEP 1
To add this in, you’ll first need to be logged in and on the EDIT screen. From here, navigate to the page(s) with your form on it and click on your page content to activate the editor toolbox, and click the </> icon to activate the “Code View.”
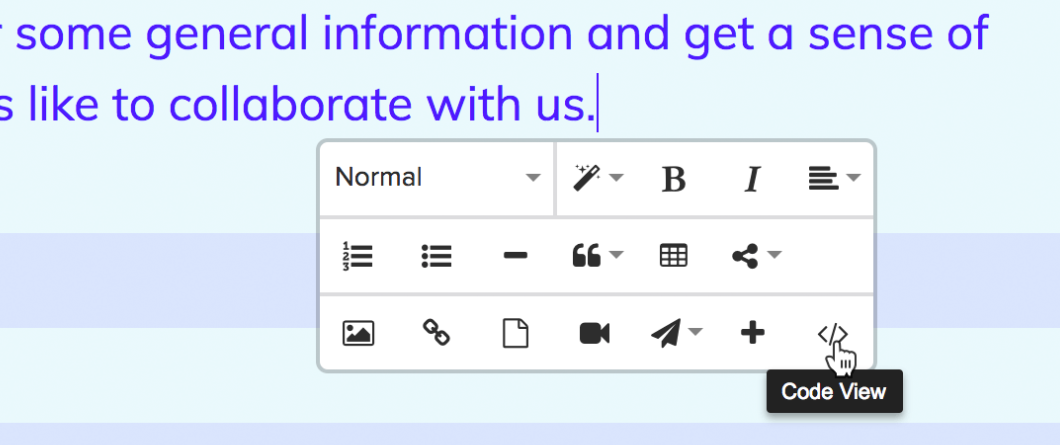
STEP 2
Within this code, find where your form is located. It should look something like this:
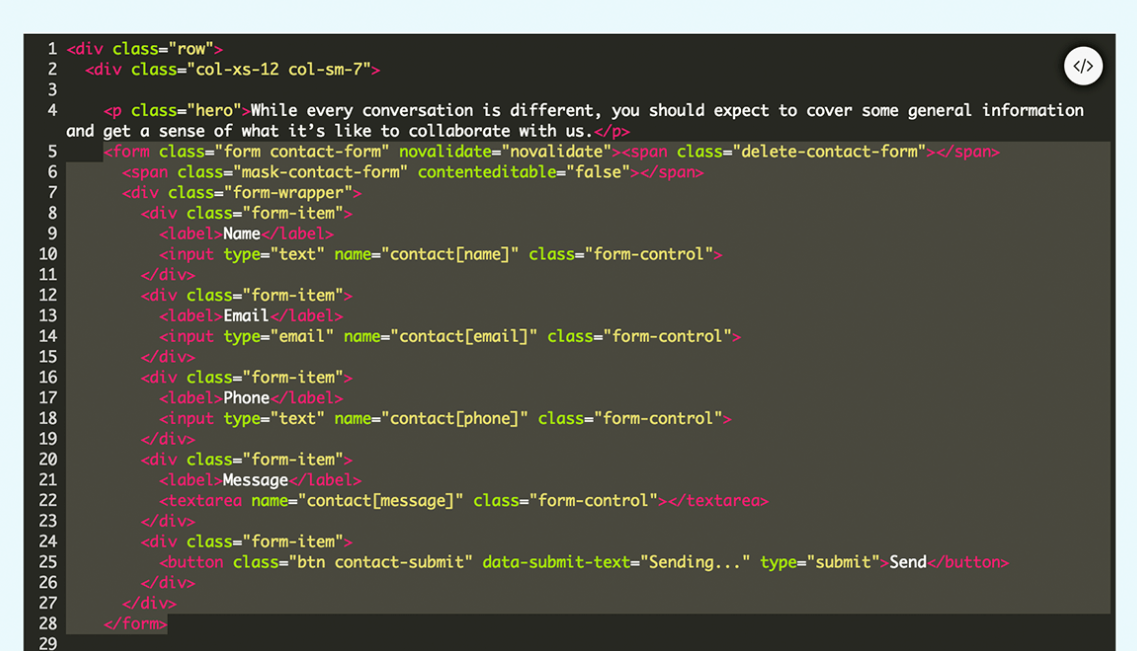
STEP 3
Each field is contained within this code: <div class="form-item"> ... </div>, so be sure you paste the code you copied above so that it falls before or after the other field’s code:
<form>
  <!-- INSERT CODE HERE -->
  <div class="form-item">...</div>
  <!-- OR HERE -->
  <div class="form-item">...</div>
  <!-- OR HERE -->
</form>
STEP 4
You will want to change the Label Text and Field Name of this field, as outlined in the first section above, but you also will need to customize your checkbox options Value and Display Text. To do this, simply find the following within the code you copy and paste:
<label class="checkbox">
  <input name="contact[your-custom-checkbox][]" type="checkbox" value="1" />Option 1
</label>
The Value here is what you see as: value="1", simply change the 1 to whatever text you want to show up in your email notifications. The Display Text is what you see as: Option 1, which shows right before the closing </label> tag. This is the text the user will see for this option, change this to whatever you’d like.
Note: You can add/remove an unlimited number of checkboxes. To create additional checkboxes in a set, simply copy and paste the above code before or after other options and customize the checkbox Value.
Important: When changing the Field Name, please note that all checkbox buttons in a set must share the same field name. Do not give them a different Field Name, or else they will each be treated as a different field entirely. In addition, Checkbox Field Names require a slightly different naming convention to work properly. Please be sure to not remove the trailing [] brackets from the Field Name.

