Customize Your Landing Page's Featured Sidebar
Adding a headshot and social links
The "Featured Sidebar" is a special box in your landing pages where your image, text, and links to your social networks and subscribe form can appear:
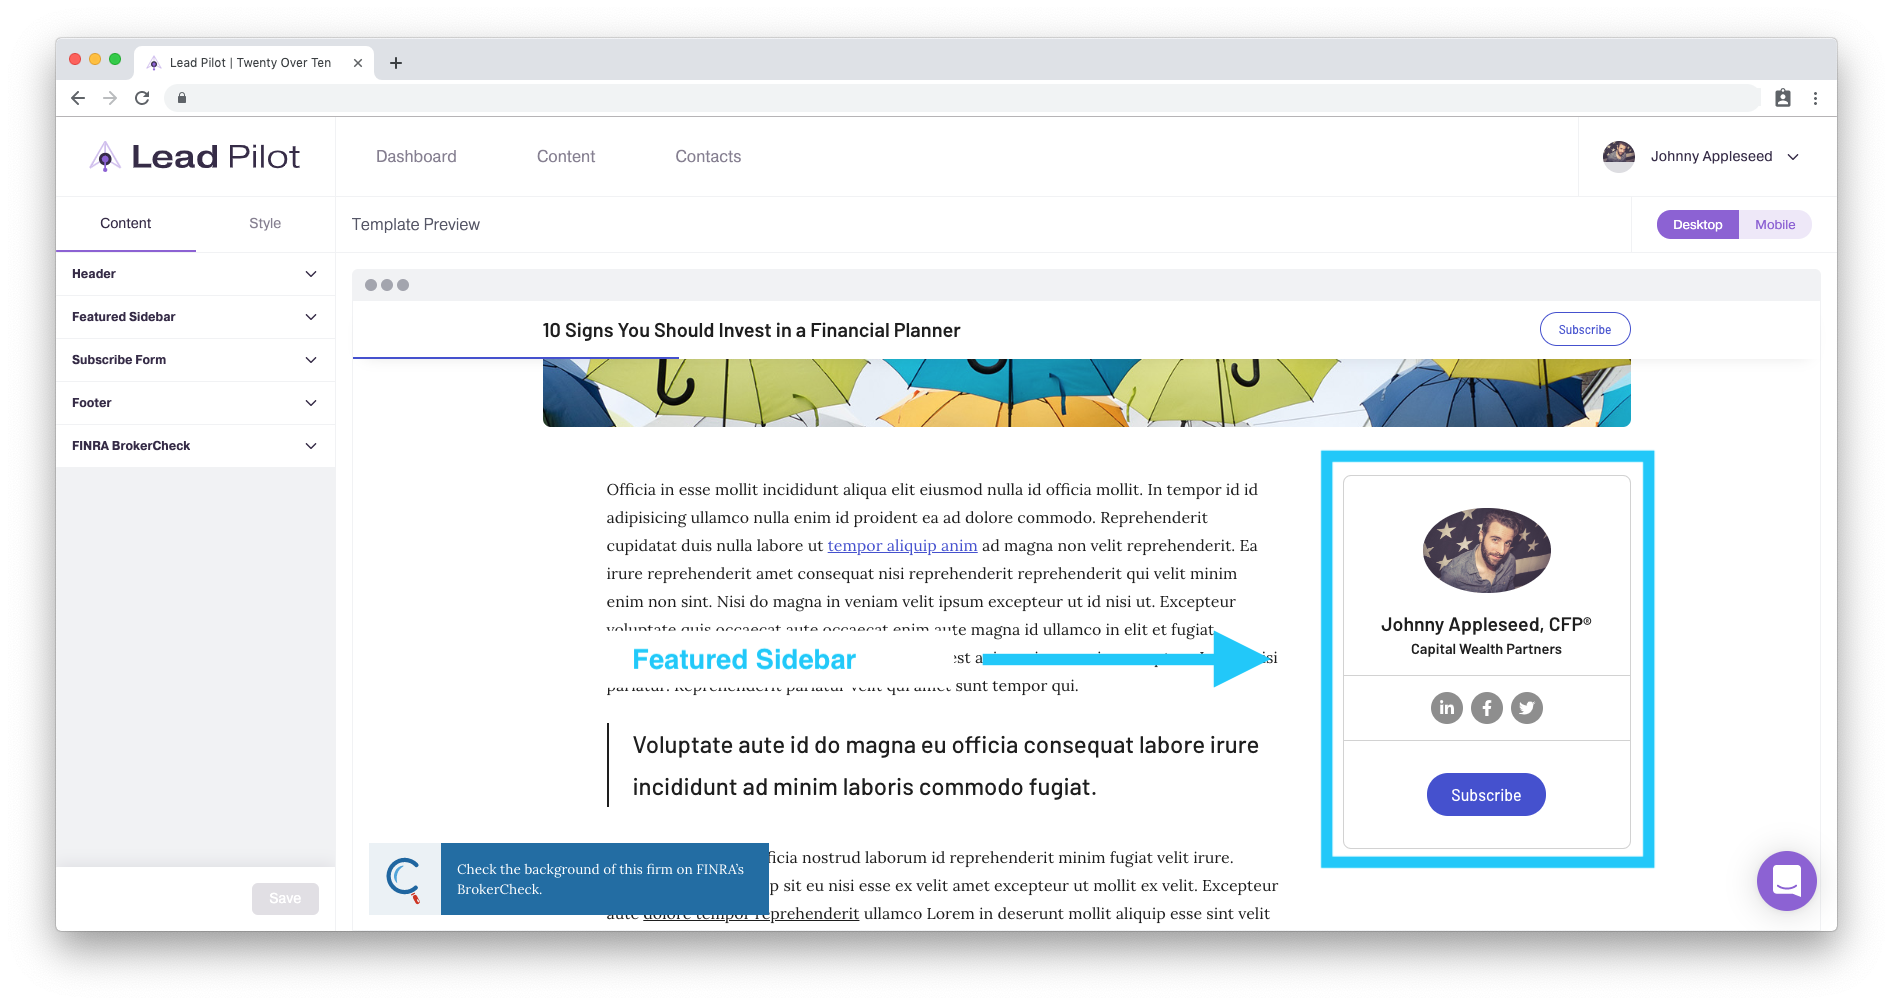
To create a featured sidebar, please follow these instructions:
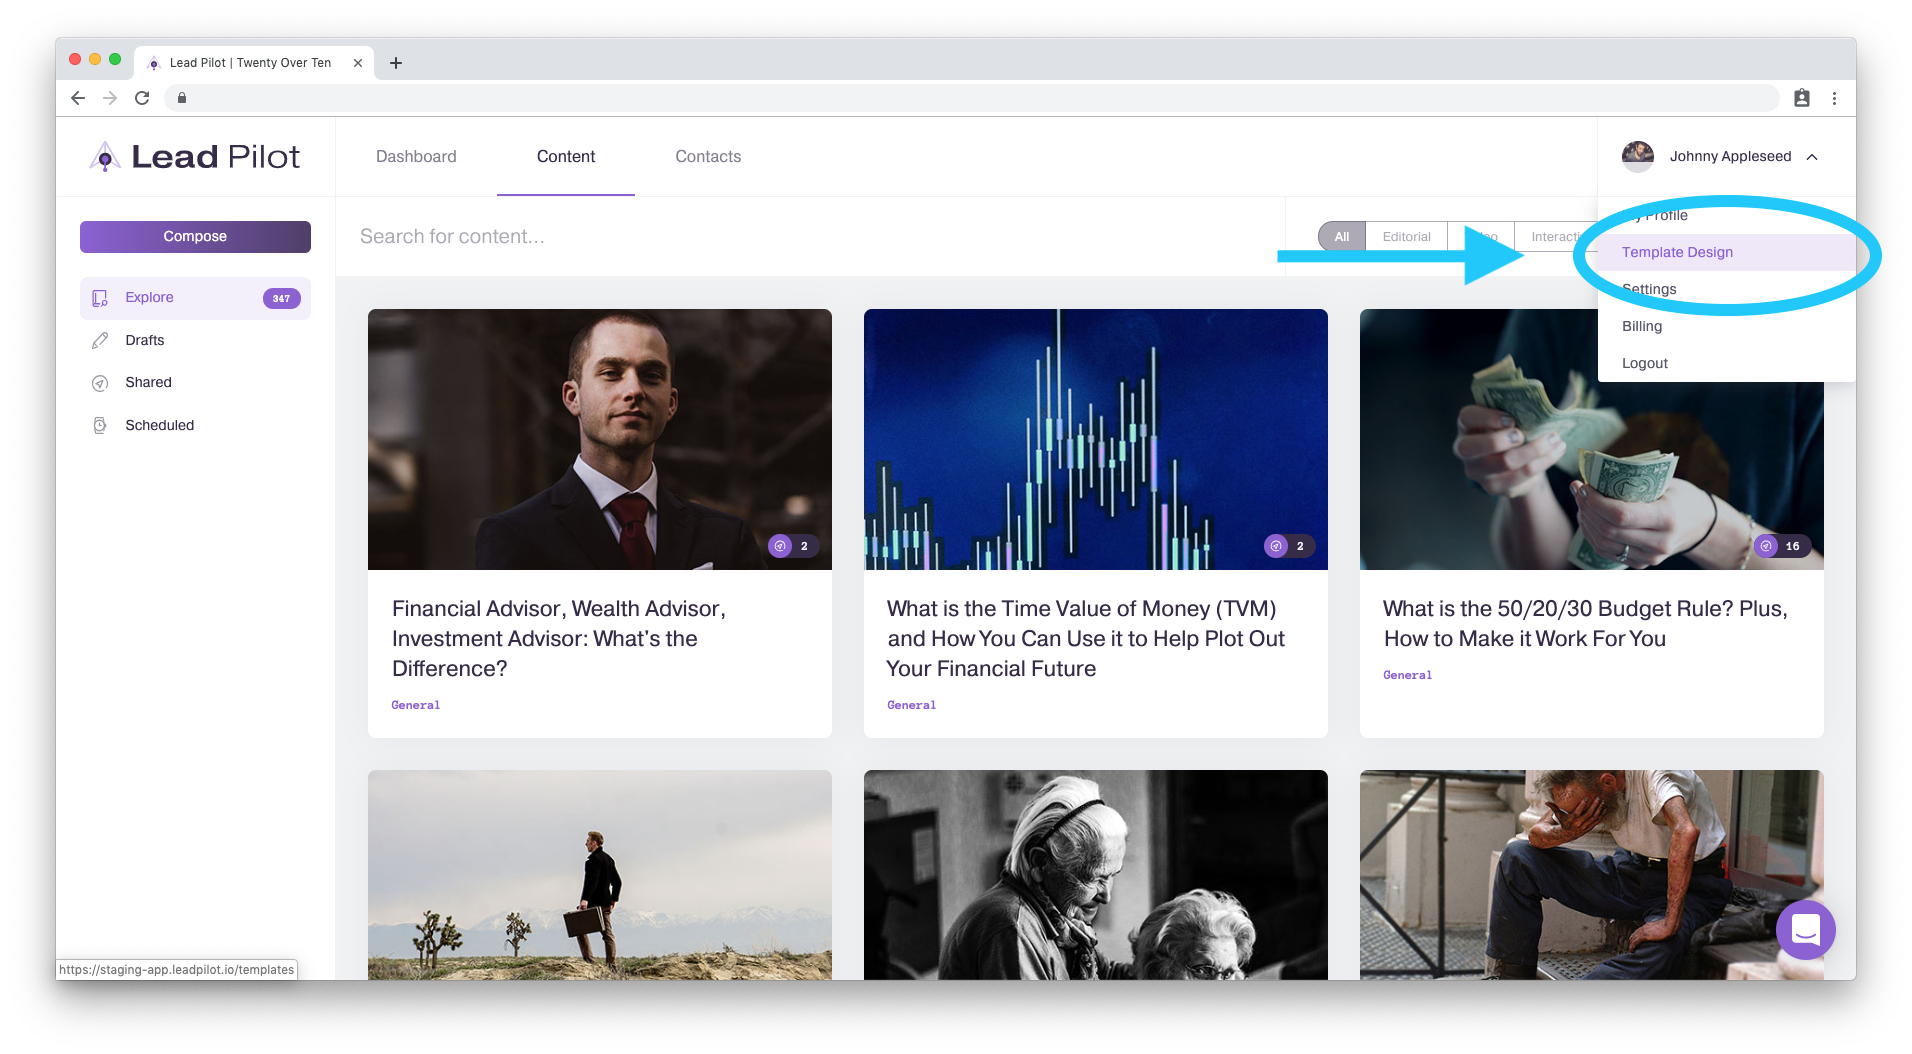
1. Go to the "Template Design" tool or scroll to the top right of your screen and hover over your name and user icon.
2. Scroll down and click "Template Design" from the drop-down menu:
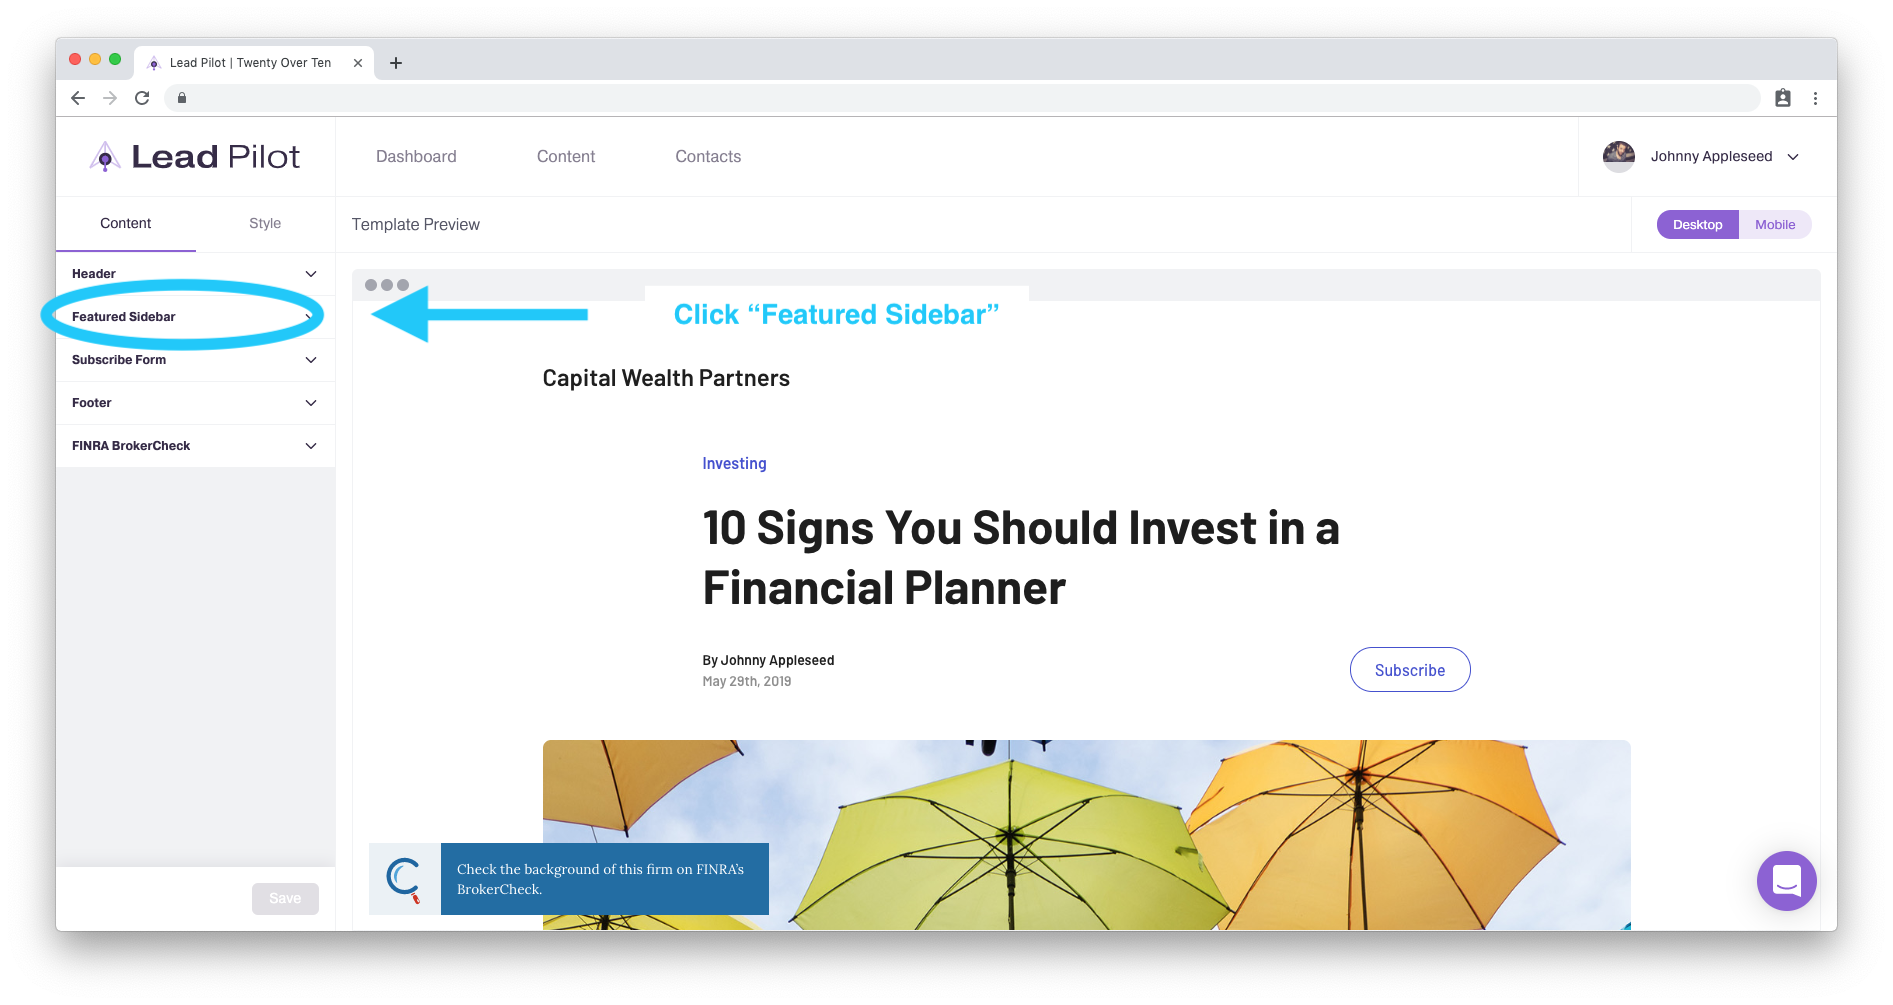
3. Click "Featured Sidebar" in the "Content" tools menu to the left:
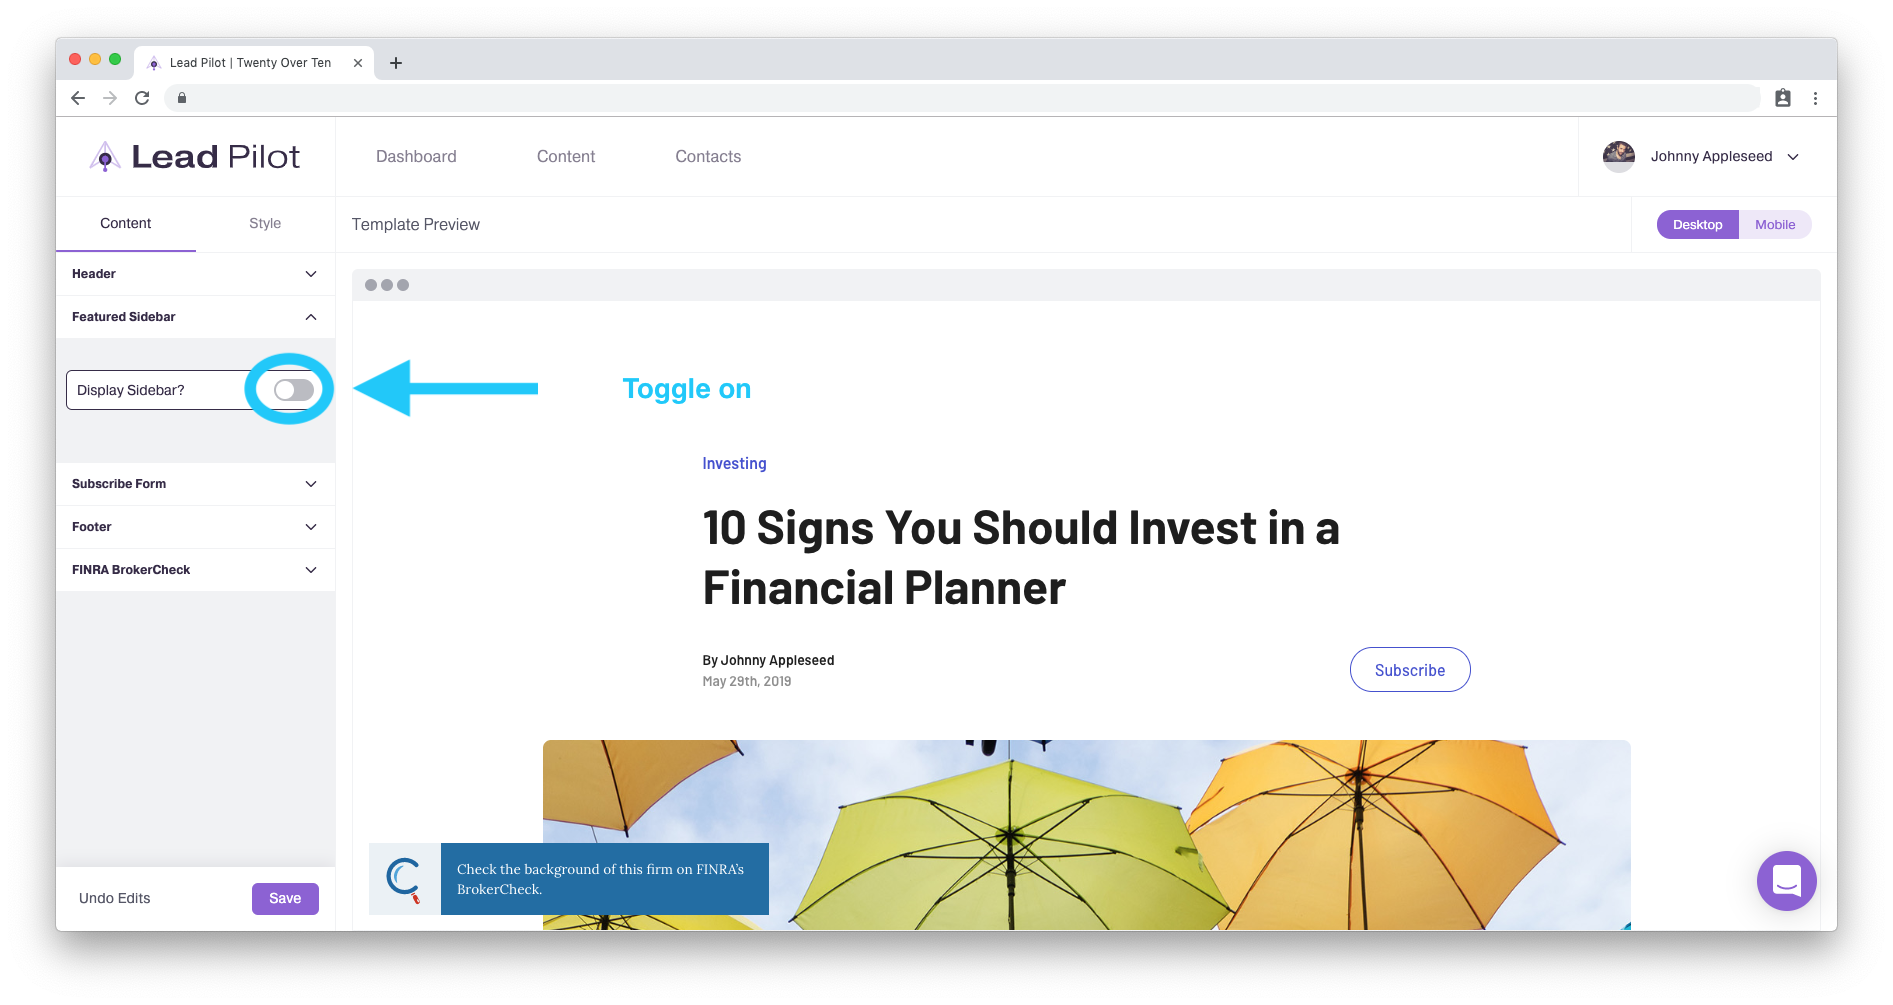
4. Toggle the "Display Sidebar" on:
5. Click "Upload Featured Image" to add a photo to your sidebar:
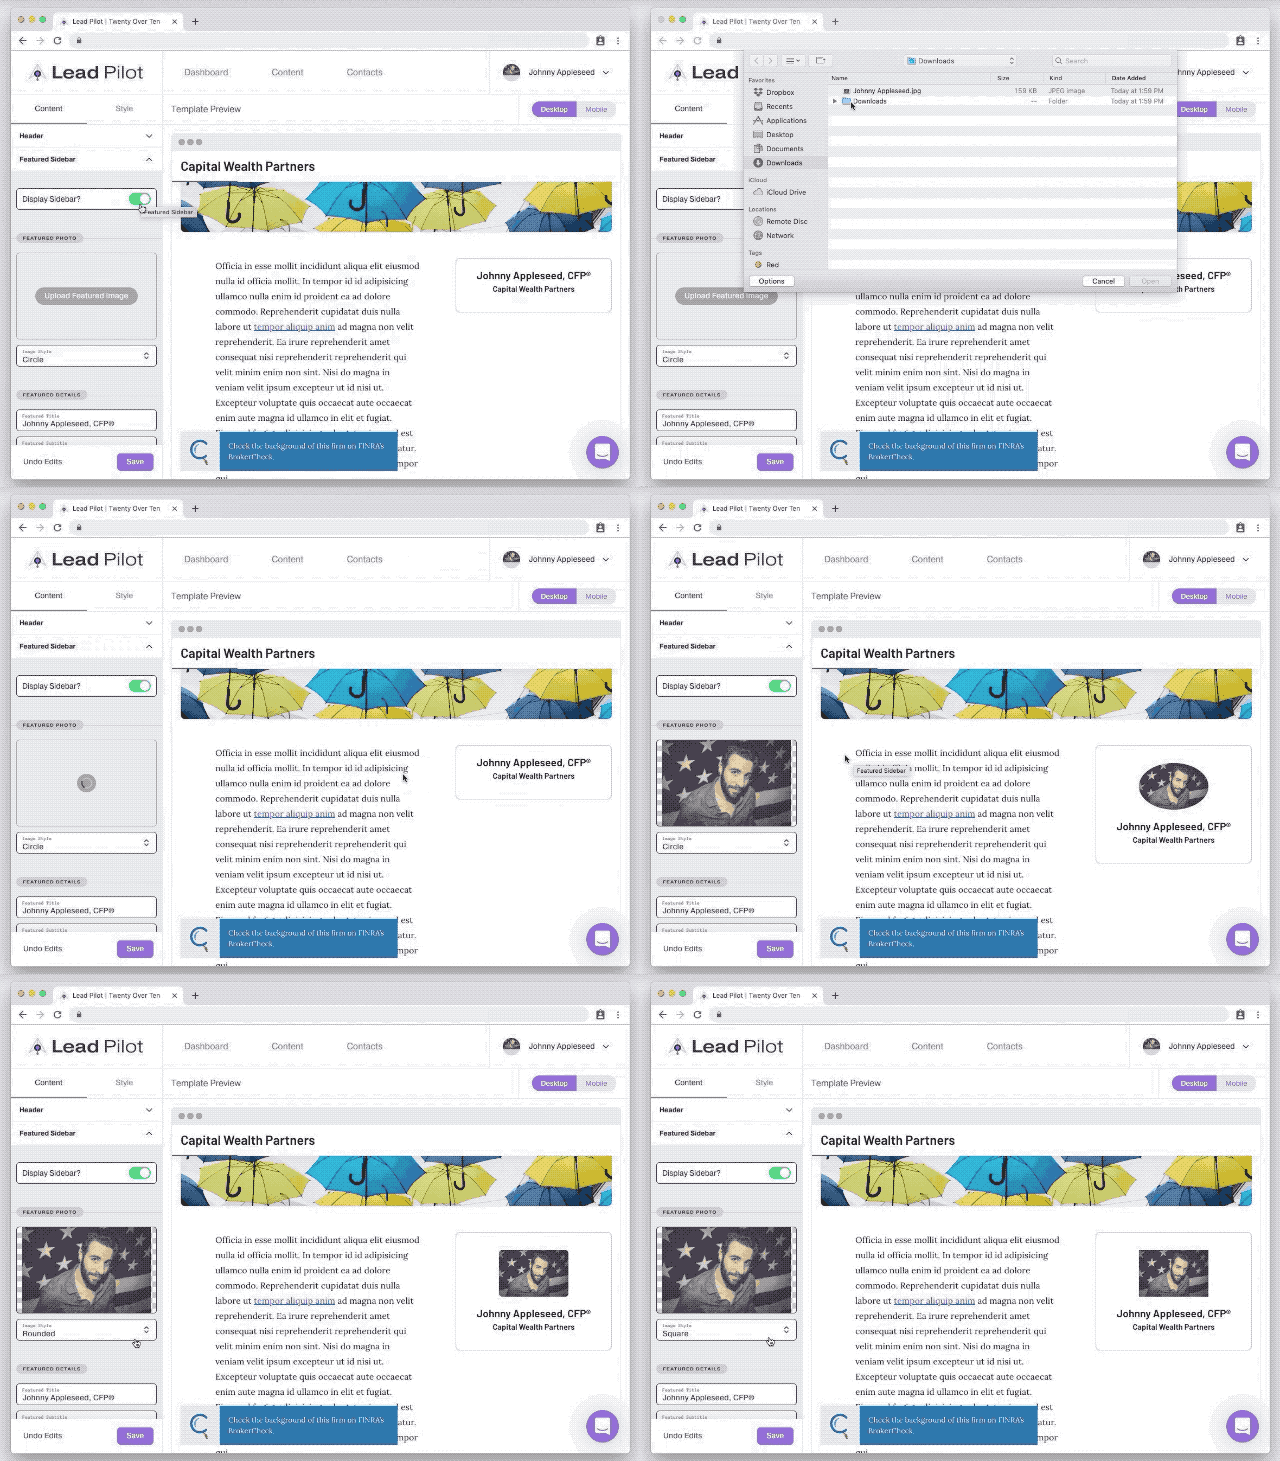
6. Click "Image Style" below your photo to change the outline shape of your photo.
7. In the "Featured Details" fields, enter in the name, subtitle, and description that will appear below your photo in the sidebar:
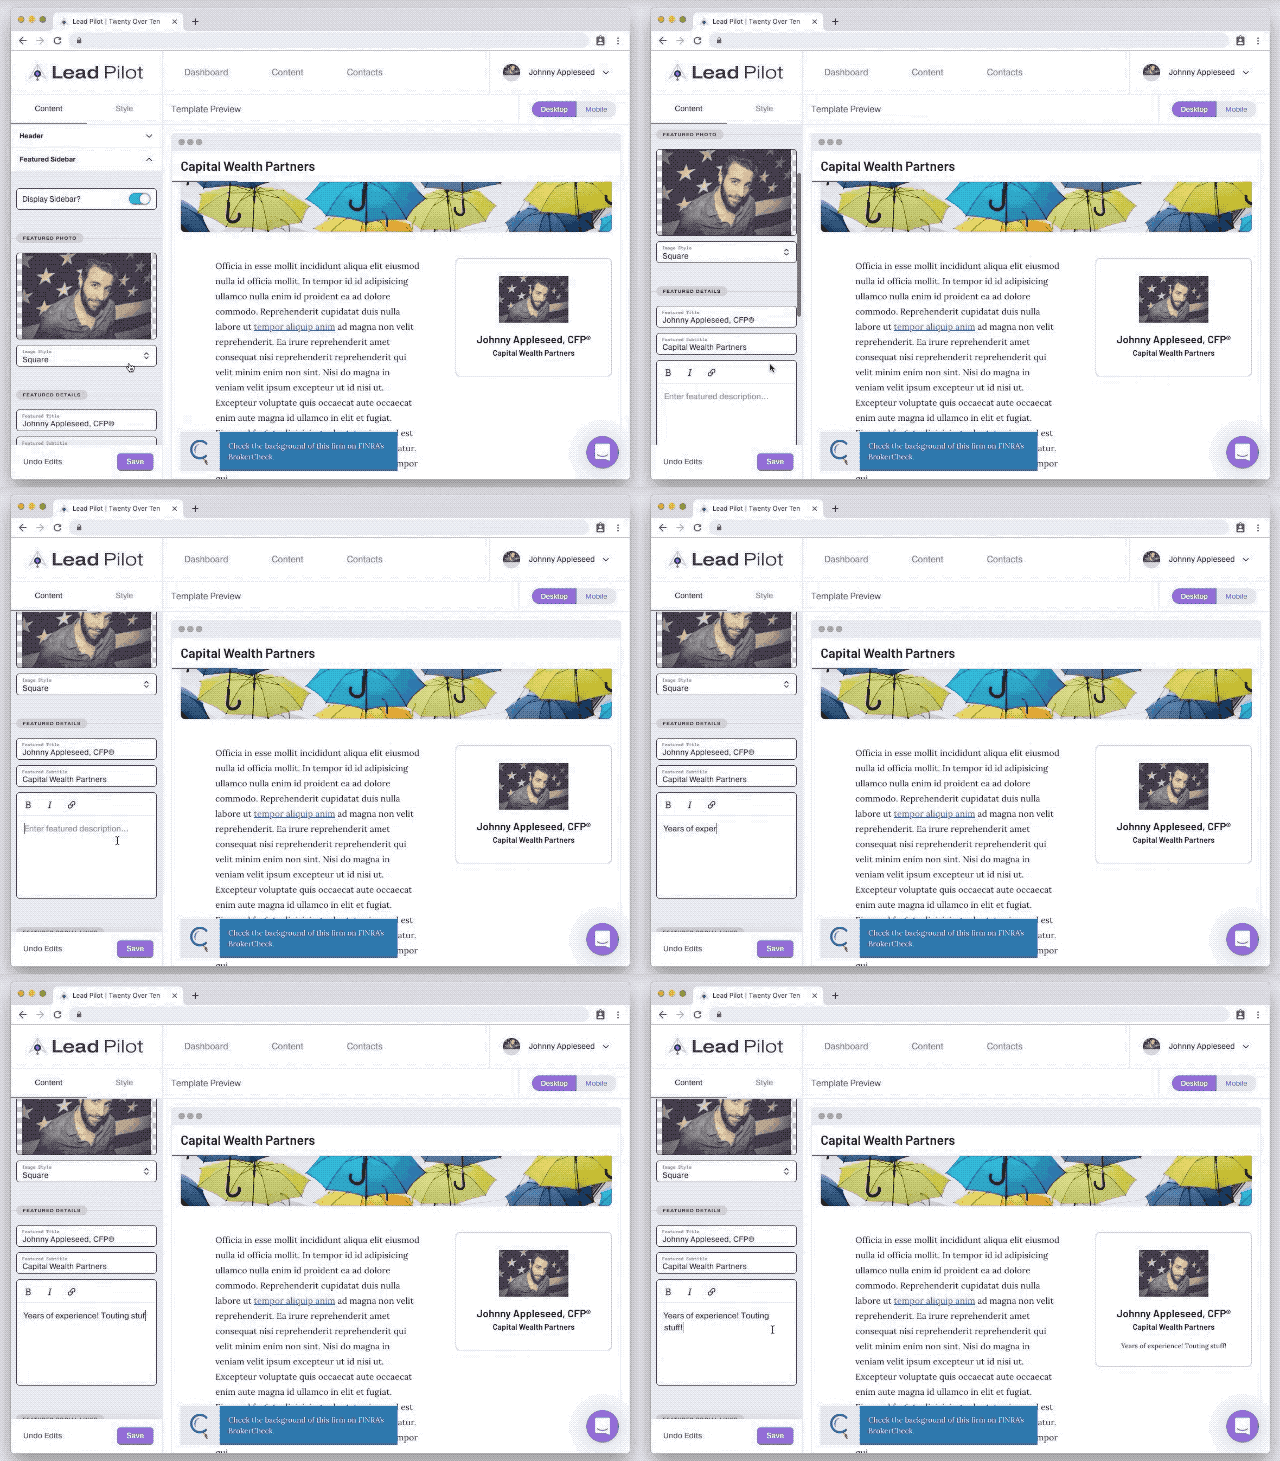
8. In the "Featured Social Links" section, click the "Add Link" button, then "+" to select a social network icon:
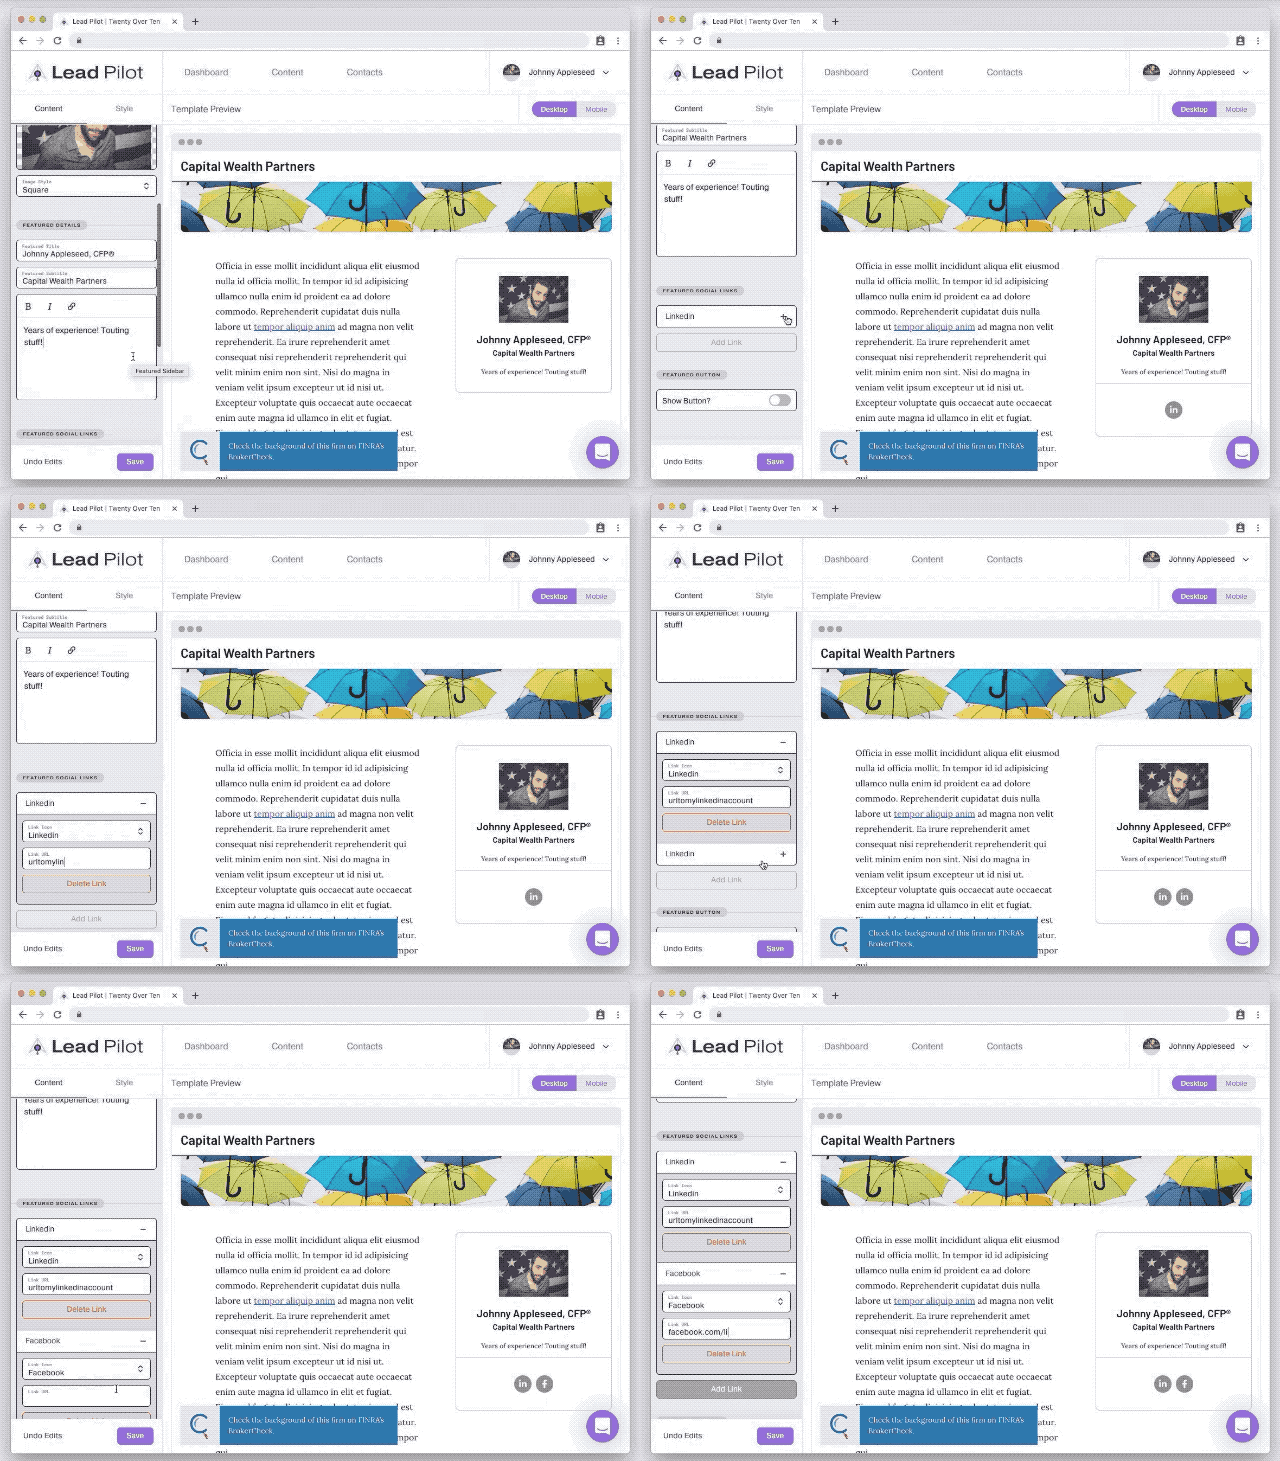
9. In the "Link URL" field, enter the URL to your social network page, starting with https:// (e.g. https://www.facebook.com/ _______ as the URL for the Facebook icon):
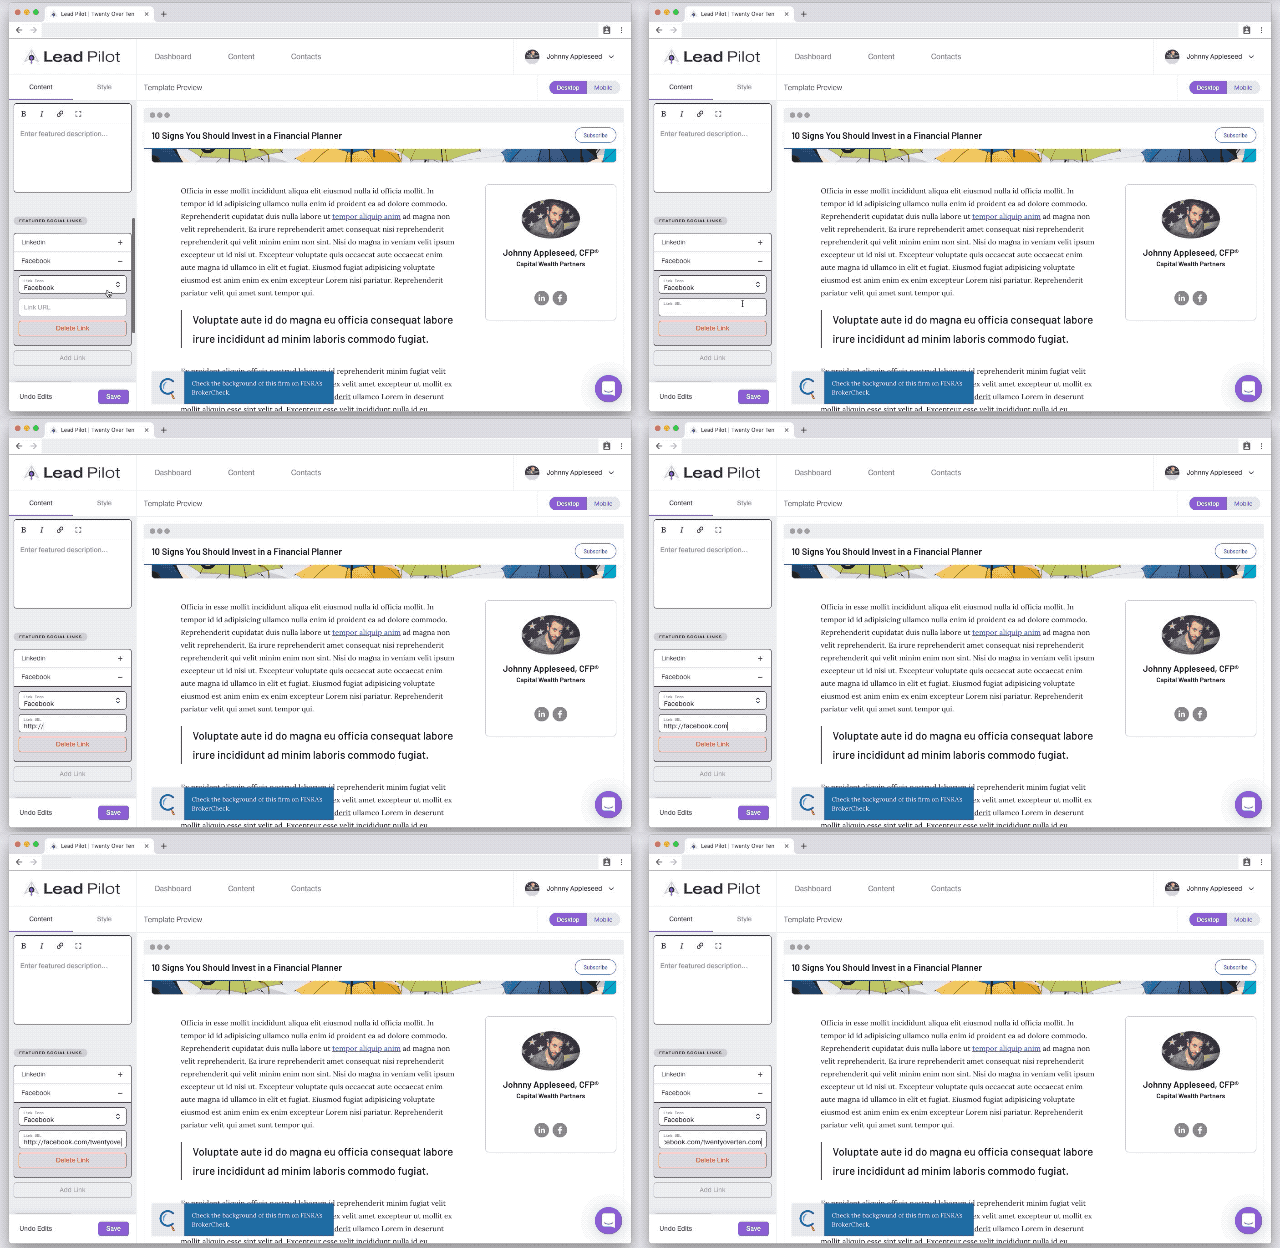
10. Click "Add Link" to repeat the process with your remaining social networks.
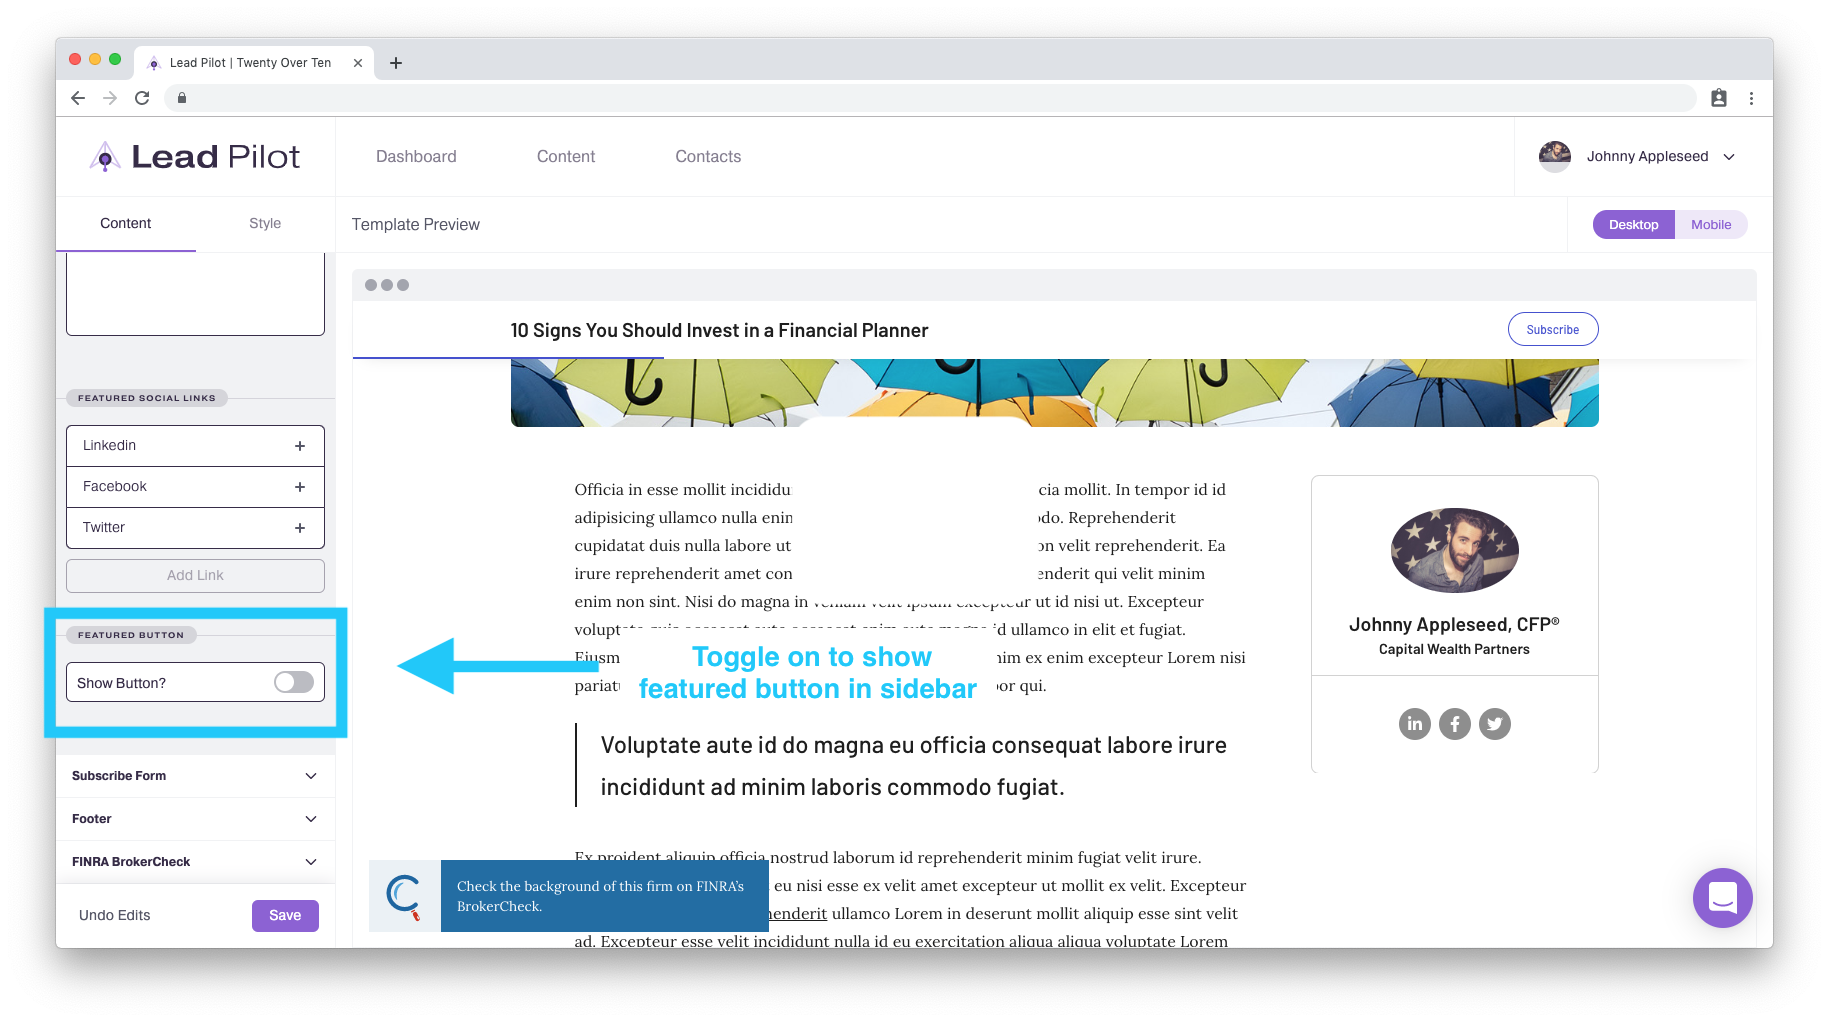
11. Toggle the "Featured Button" on to display a "Subscribe" button in your sidebar. The subscribe form will pop-up by default when someone clicks the button:
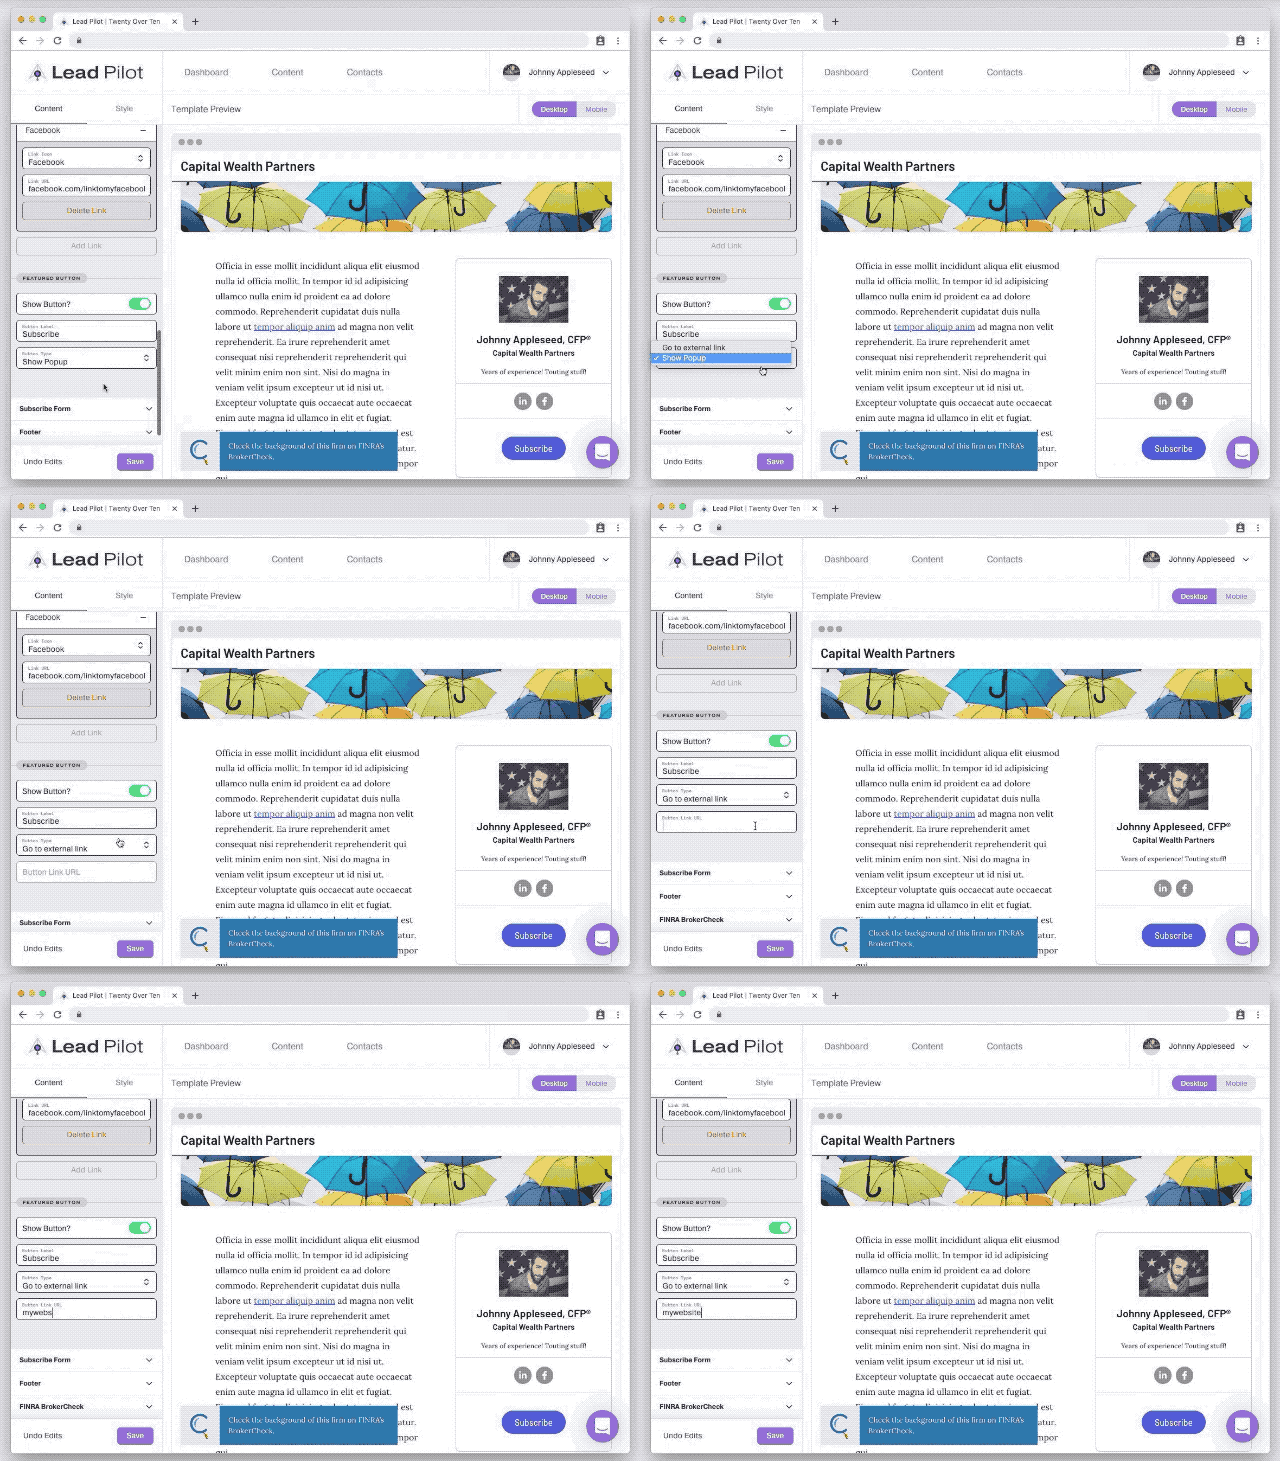
12. You can make the button redirect to another website by selecting "Go to external link" as "Button Type" and then entering your desired URL:
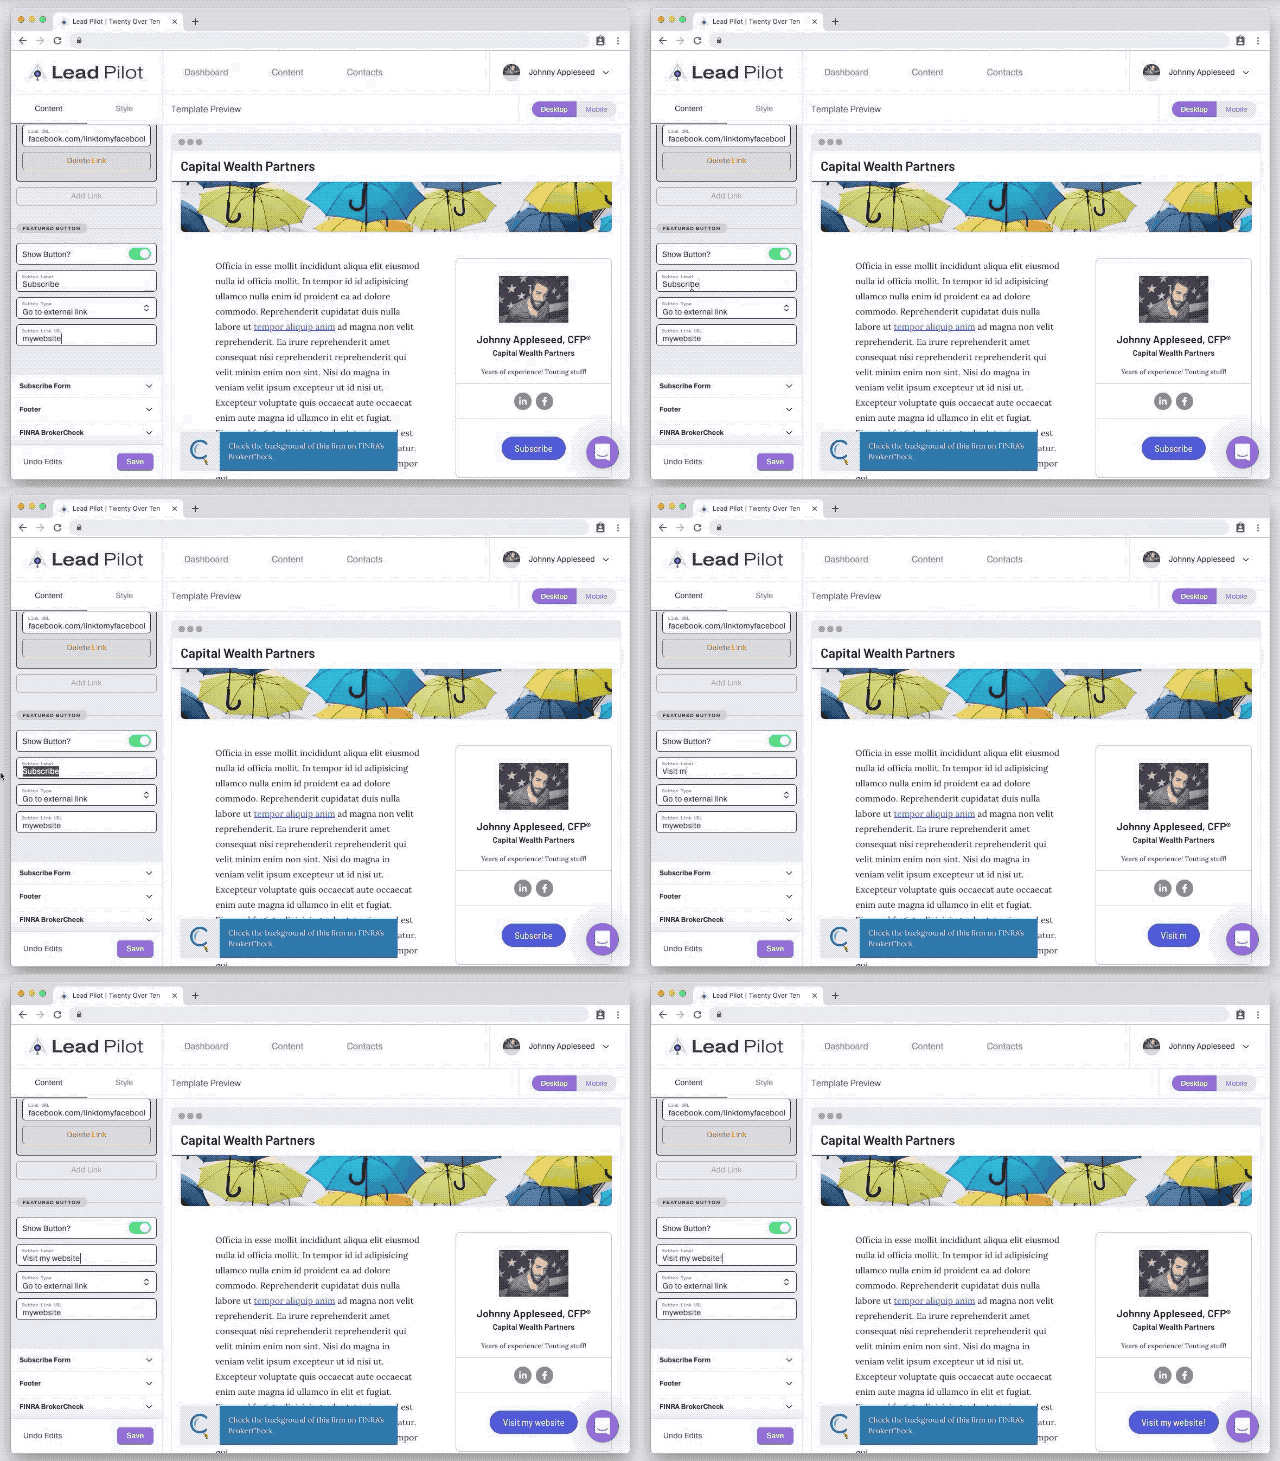
13. You can change the button's text by typing into the "Button Label" field:
14. Click the "Save" button to save your changes:
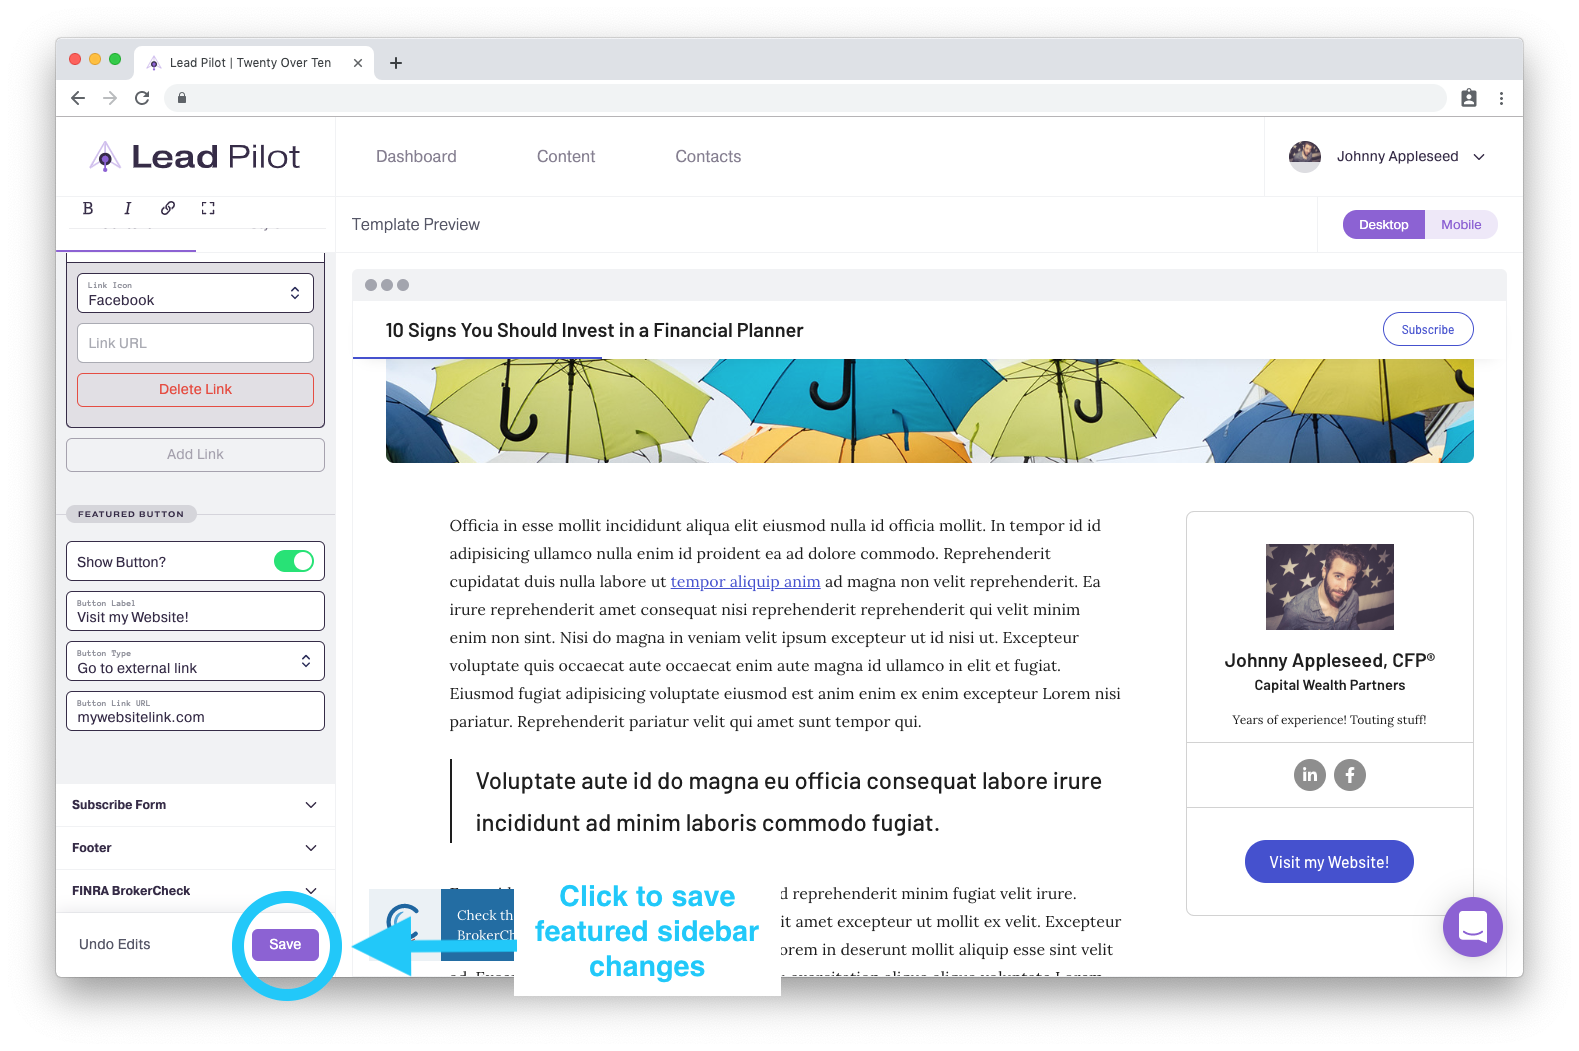
Click "Undo Edits" to the left of the "Save" button to return your template to its previously saved settings.