Add Your Email Address to Lead Pilot
Adding the name and address so you can send emails from Lead Pilot
Before sending emails through Lead Pilot, a few steps must be completed.
Before sending emails through Lead Pilot, a few steps must be completed.
Adding your Email to Lead Pilot
1. Go to your email settings or, click on your profile picture in the upper right corner to open a menu of options.
2. Click on "Settings":

3, In the Email section click "Manage":

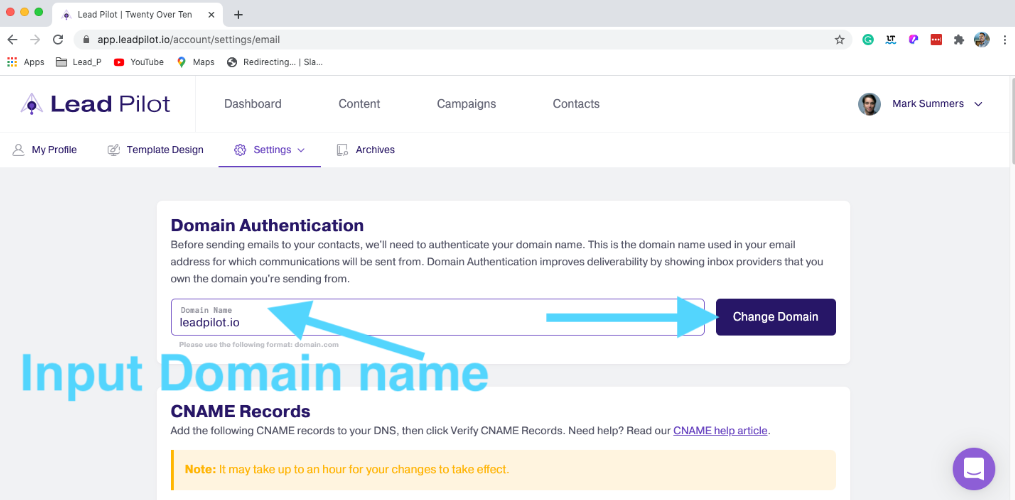
4. Type your domain name into the domain name field and click "Change Domain":
** Important: This should match both your website domain name

5. Once your domain has been authenticated, the second step of adding CNAME records to your DNS host can be started. This video below covers the process:
Key Tip: You are beginning the domain authentication process. (this allows you to send emails from Lead Pilot).
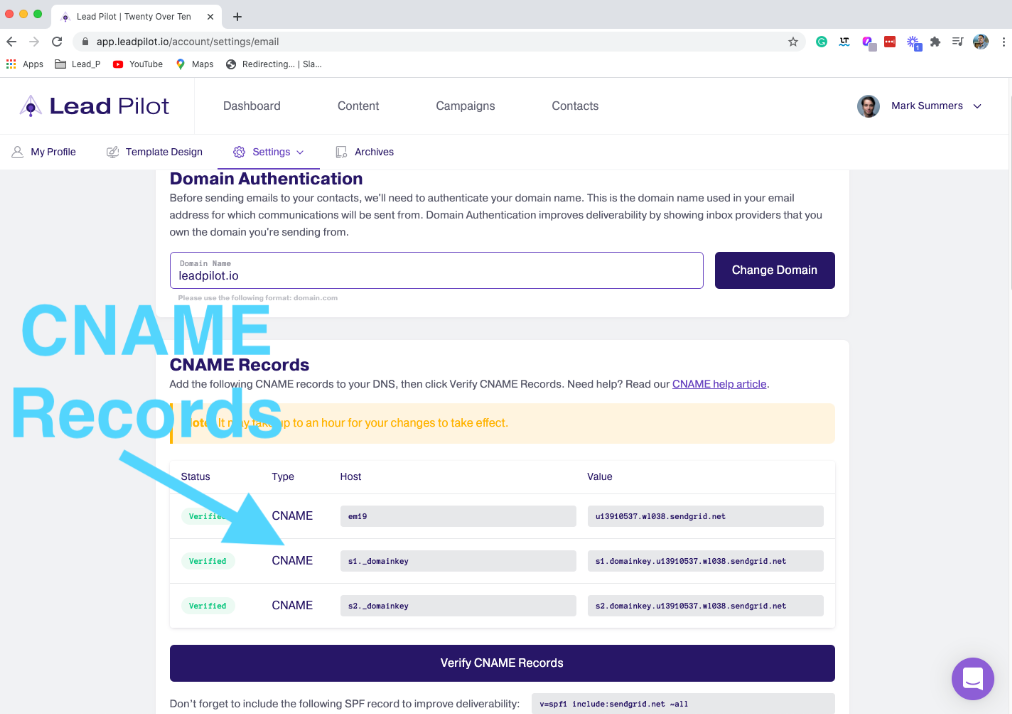
6. After you click "Change Domain", CNAME records will appear. These CNAME records need to be added to your DNS Host in order to connect your email to Lead Pilot.

If you do not know your DNS host, you can use MxToolbox. Type your domain name in the search box and click "DNS Lookup".

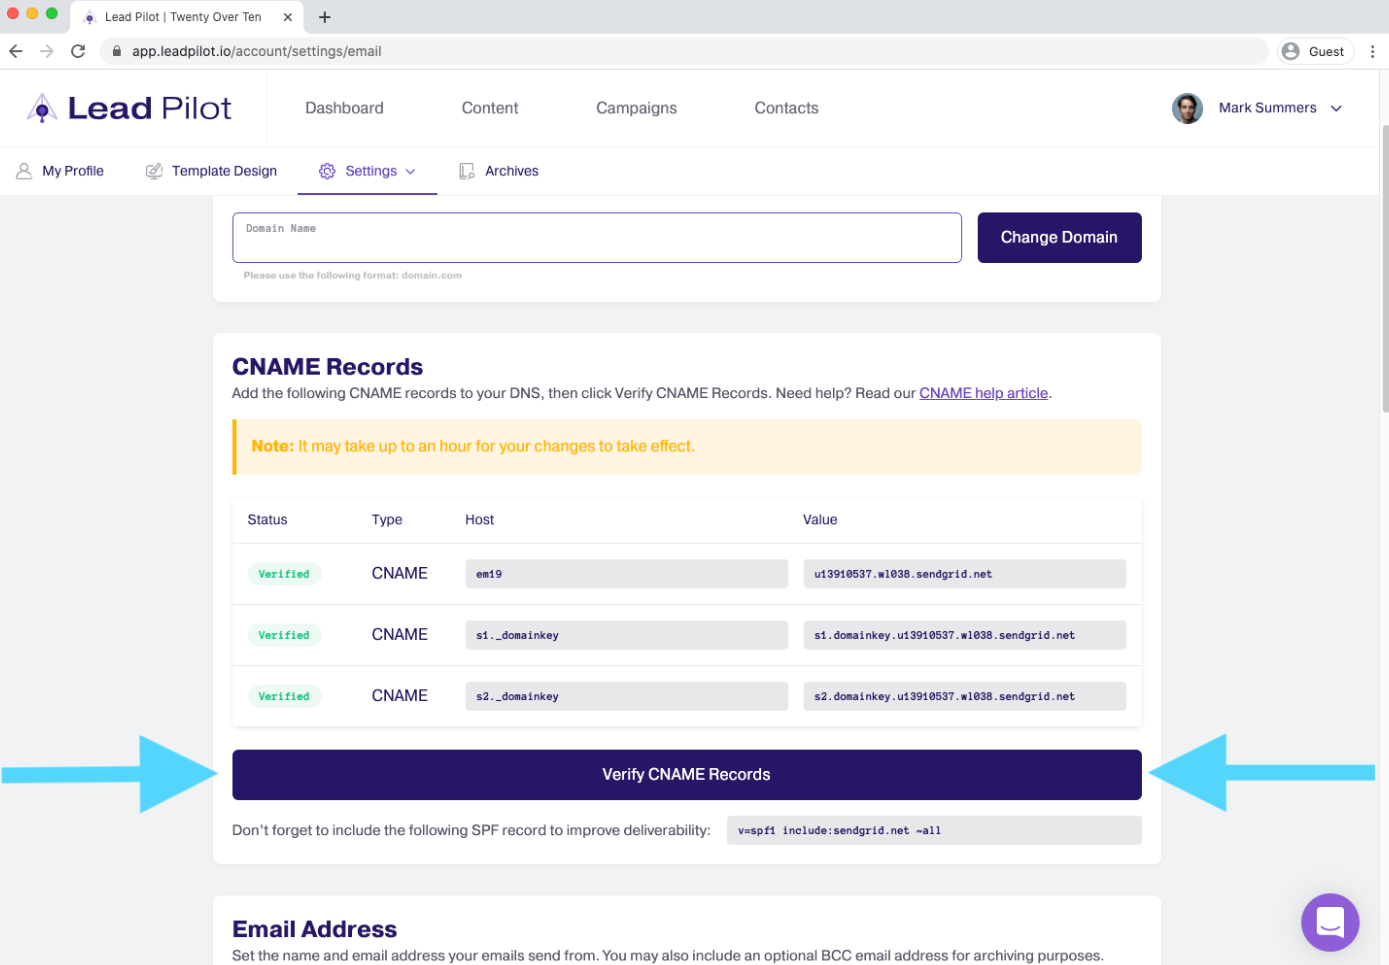
7. Once you have added the CNAME records to your DNS host, click the "Verify CNAME Records" button. Note: It may take up to an hour for your changes to take effect.

Hot tip: You have the option of creating an SPF record to improve email deliverability. Click on SPF Record to learn more about adding SPF to your DNS host.
8. The Email Address section includes the following fields to add your email display name and email address:
-
Display Name Field - what you want to be displayed as your name (The "Display Name" should be something familiar to customers, like your company name)
** Important tip: Do not use a comma in the "Display Name" field. The ⎜and ® Symbols that are ok to use.
-
Email Address Field - The "Email Address" must match the domain that was authenticated.
-
BCC Address Field (optional) - an email set up for archiving purposes.
After you type your email information, click the "Change" button.

You will receive an email confirmation from (noreply@leadpilot.io) Lead Pilot to verify your email address.
![]()
Open the email and then click on the Verify Email Address button.
TIP: You must be logged into your Lead Pilot account before clicking the Verify Email Address button

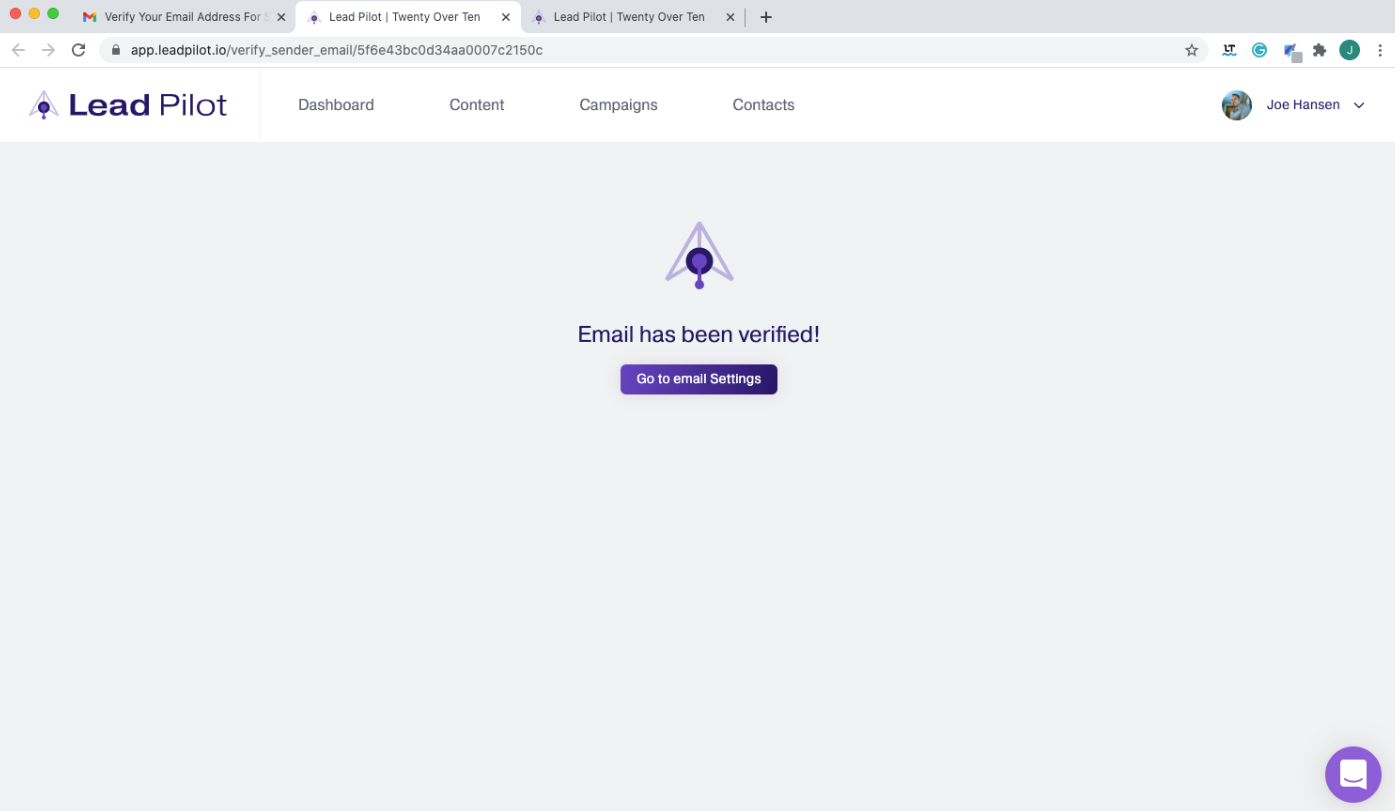
After you click the verify button, you will see "Email has been verified!"

** Important Tip: The domain you add in the domain field must match the domain used in your email. For example, if your domain name was leadpilot.io, then the email you will use will look something like this - hello@leadpilot.io.
Congratulations! Now you're ready to Import Contacts, Customize the Look of Your Emails, and Share Content (send your first email)!